How to leverage fonts on Shopify (developer guide)

For merchants, an essential part of the e-commerce experience is communicating your brand through your store. One of the pillars of brand design is selecting your brand's fonts, as they're a great way to establish recognition and define the tone of your brand.
Shopify makes it easy for merchants to change their online store's fonts through the theme editor. Most themes have a Typography setting that allows you to choose from one of the many Shopify-hosted fonts. However, what happens if the merchant needs to use a font that Shopify hasn't licensed? Furthermore, if this third-party font isn't hosted, how do we implement it on our site? Let's explore the answers to the questions today.
1. Host your font
The first thing we need to figure out is where will our font files be hosted? If the merchant has the raw font files, we can add them to our codebase and they'll be hosted by Shopify alongside the rest of our site. These files will end in either .woff, or .woff2 file extensions. Keep in mind that different variations (Light, Semi-Bold, Bold, etc.) of the font may have their own font file.
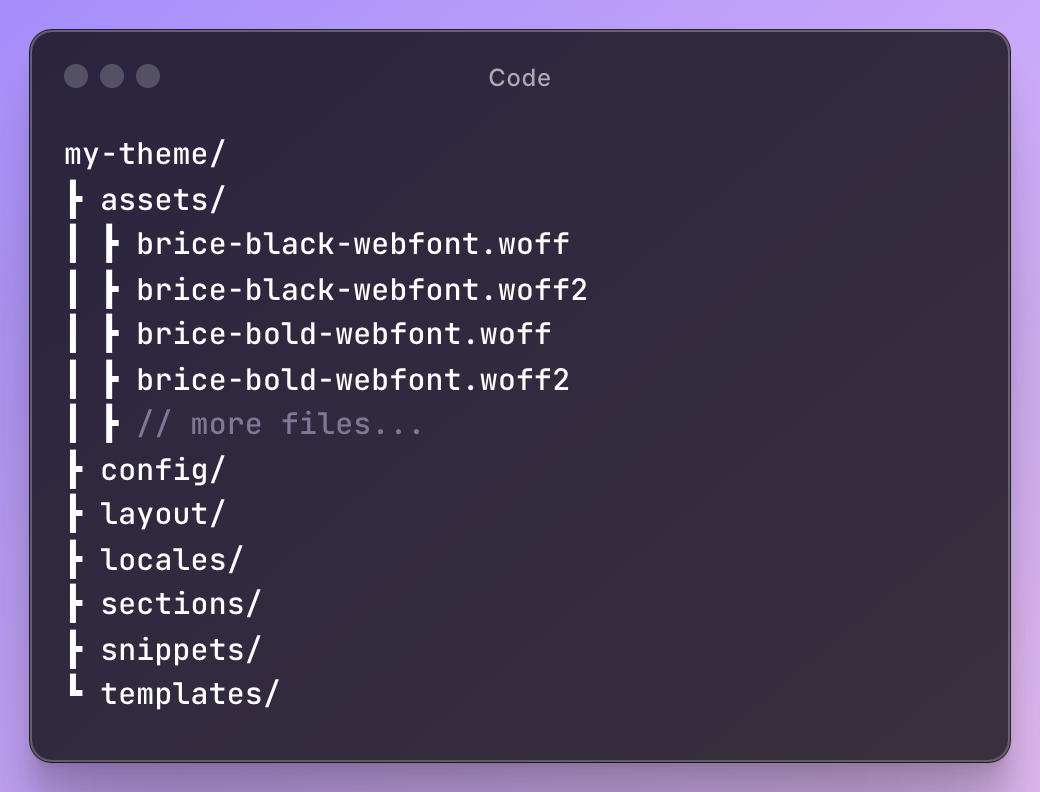
With our font files in hand, open up your theme's codebase on your machine and copy them into the /assets folder. It's totally fine if you have both a .woff and .woff2 file for each font weight (we'll handle this). In the example below, I added both the Bold (font-weight: 700) and Black (font-weight: 900) weights of the Brice font family to my theme.
2. Declare your fonts
Next, we'll need to declare our fonts. This step involves telling the browser how to fetch and use your font files.
[!attention] Heads up! The remaining steps will vary depending on how your theme manages its stylesheets. I'll show you one way that should cover most cases. 💪
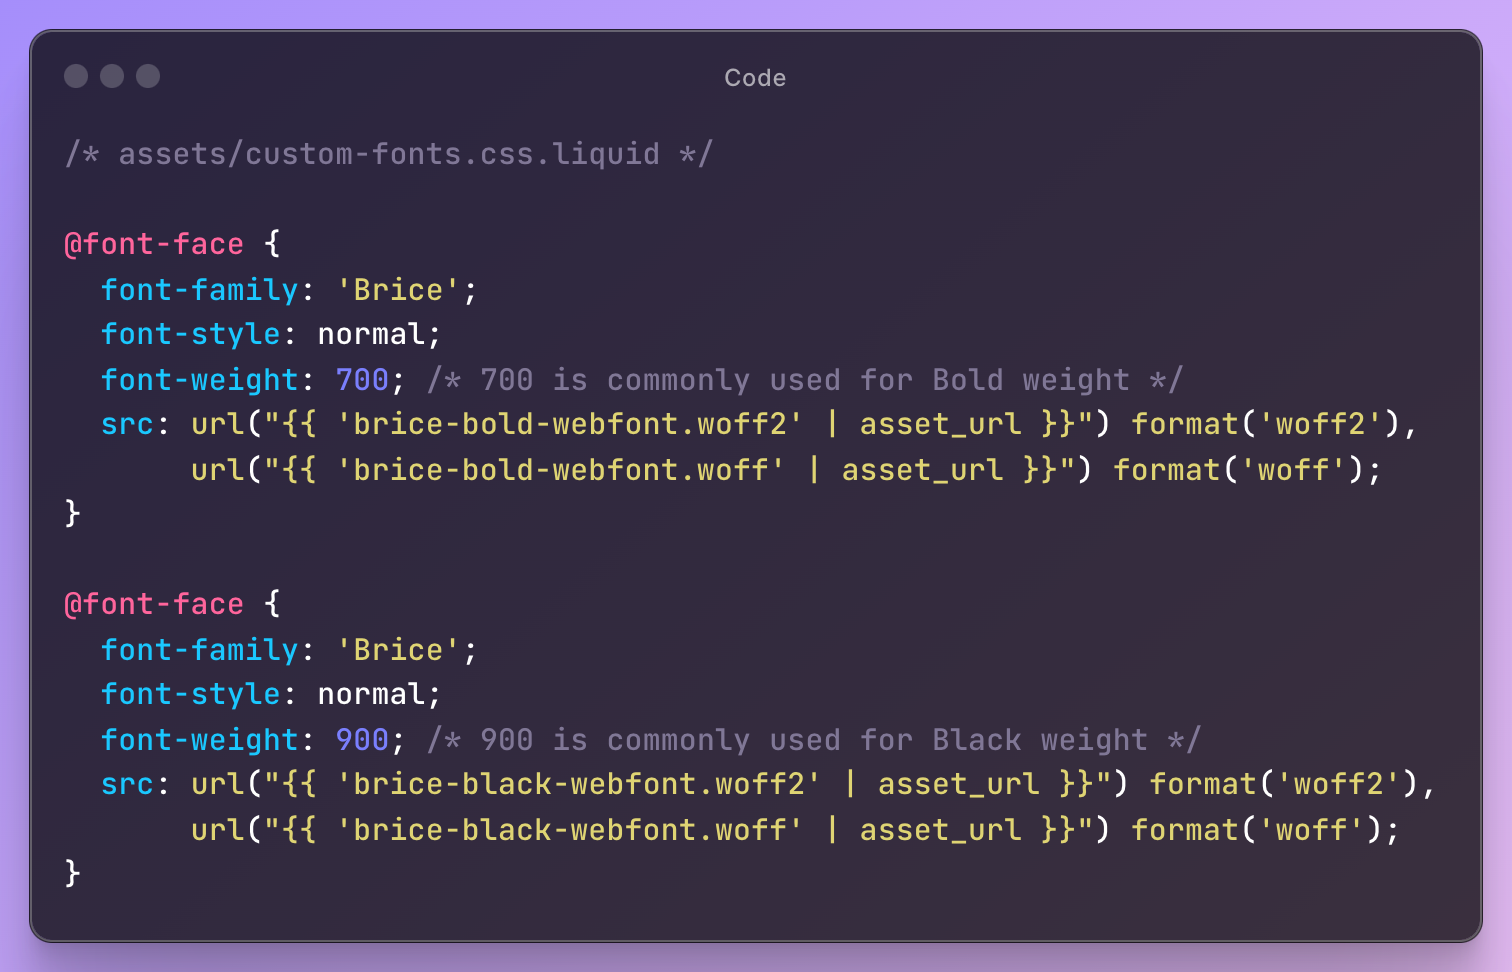
Create a file called custom-fonts.css.liquid inside the assets folder. Make sure that this file ends in .liquid! I lost valuable time debugging an issue with custom fonts by forgetting this step.
For each font weight that we've added from the previous step, we'll need to declare a font-face. Again using the Brice example, see the font-face declarations below:
What's happening here?
Well, these font declarations act as a map for our CSS styles to find the right font. We'll see this in action in a later step -- remember this moment! 💭 Also, note the use of Liquid syntax here; the asset_url filter helps us out by handling the final URL of our font files, we just have to make sure the file names are correct and that they're in the assets folder.
3. Include your font
Moving on! Let's make sure our third-party fonts are available everywhere in our theme. Locate your theme.liquid file and add the following line within the <head> tags:

What's happening here?
In the last step, we declared our fonts in a new file (custom-fonts.css.liquid), but that doesn't mean those fonts are available to us to apply to elements yet. We must include the file containing them, and now we have!
4. Apply your fonts
With our fonts hosted, defined, and included, we can now apply them to elements in our site. As mentioned before, different themes and their application of CSS will vary. Many themes will have a stylesheet that covers the theme more generally, like theme.css, theme.css.liquid, base.css, or base.css.liquid. Navigate to the proper file for your situation, and try to add CSS rules for font-family to a couple of elements of your third-party font. Here's my example:

What's happening here?
Remember when we declared two font faces earlier, one for Brice Bold (700) and Brice Black (900)? The CSS rule here will find the @font-face we declared which has a font-family value of "Brice" and a font-weight value of 700, and use that "map" to pull the correct font. So make sure your font-family values are the same in the CSS rule and the @font-face declaration!
5. Test & celebrate your fonts
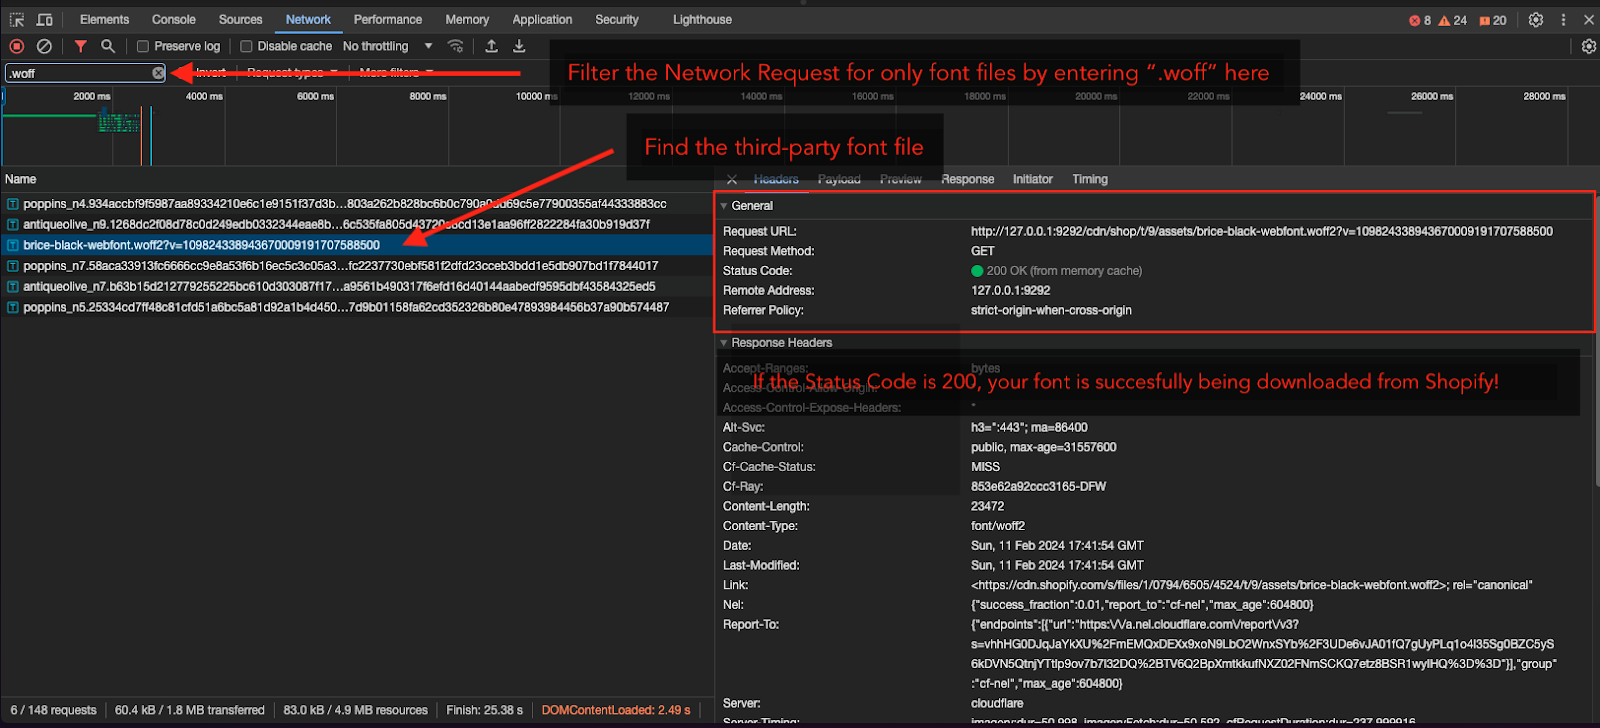
At this point you'll probably see your fonts being applied to whatever elements you've targeted. If you aren't, or if you want to verify the success of the setup, you can use your browser's developer tools to do so. Navigate to the Network tab, filter the requests for .woff files and locate the request for your font file. You should see something like the screenshot below
Bonus: Tie settings in with your font
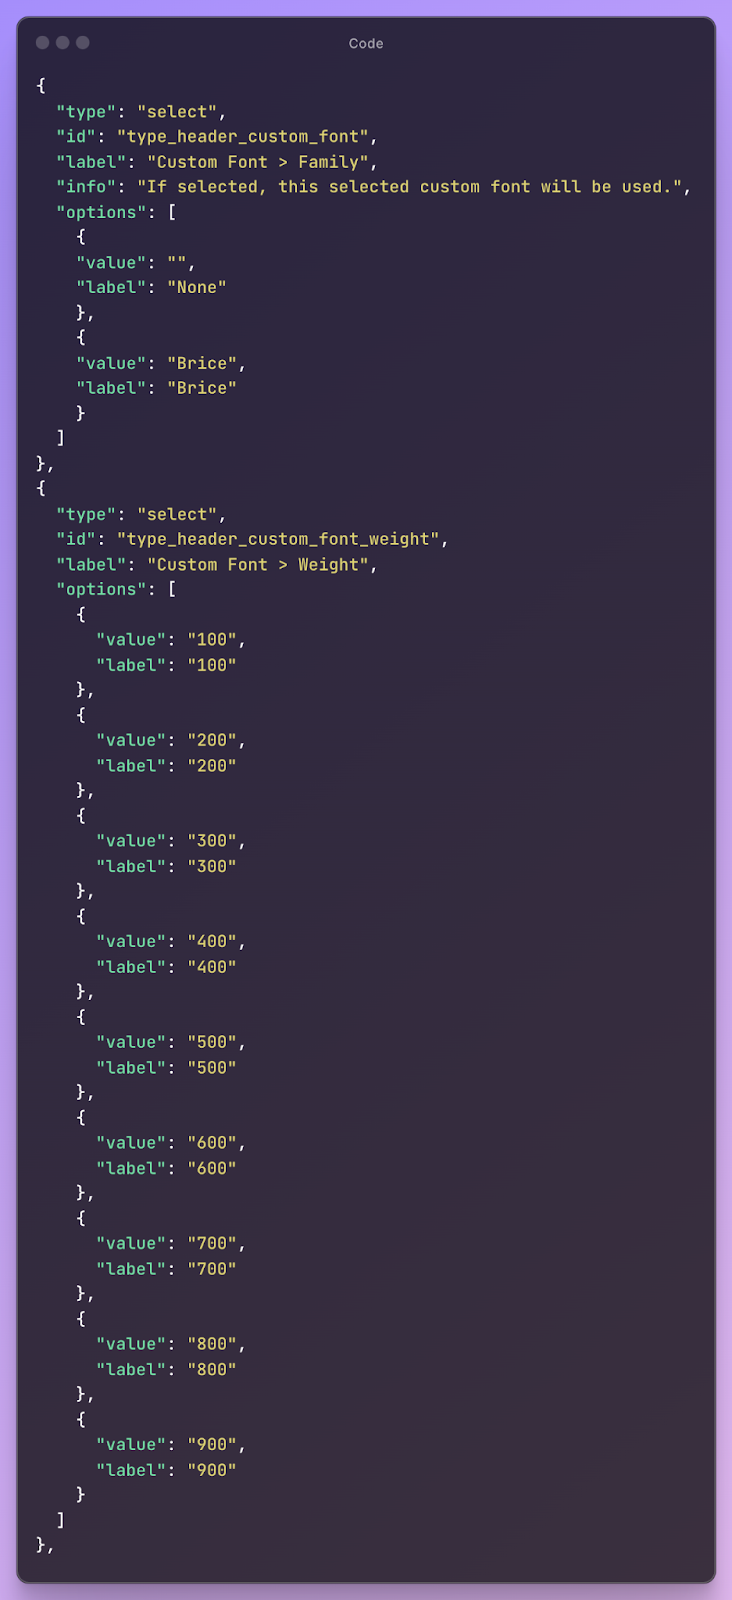
It should be noted that third-party fonts, self-hosted or hosted by another (i.e. Google Fonts), will never be selectable through a font_picker setting. If you want to give the merchant the flexibility of modifying the font family and weights that are applied in their site, we'll need to create a custom font picker solution. It might look something like this:
A few notes on this:
- I would probably remove the font weights we're not using so the merchant doesn't have the option to select a weight that isn't supported.
- The id value of these two settings indicates that this custom font should be applied to headings. You may want to repeat these settings for body text, links, menus, etc. Just make sure to update your id values so they are unique
- You'll also need to manage the linking up of this setting with your theme, but this should get you started!


Shopify Expert?


