How to Use Shopify Functions to Build Custom Experiences
Staying one step ahead in the competitive ecommerce landscape isn’t easy. As the digital landscape continues to evolve, consumers are expecting more than ever from the ecommerce stores they interact with. They don’t just want a streamlined digital shopping experience, they want unique, personalized experiences tailored to their specific needs.
Unfortunately, creating those experiences isn’t always simple, particularly with some of the more rigid ecommerce platforms out there. That’s why Shopify introduced Shopify Functions, in 2022, a solution the company continues to adapt and optimize today.
Shopify Functions gives developers and business owners a streamlined way to build unique commerce experiences, by injecting custom code into Shopify’s backend logic.
Here’s everything you need to know about using Functions in your Shopify store.
What are Shopify Functions?
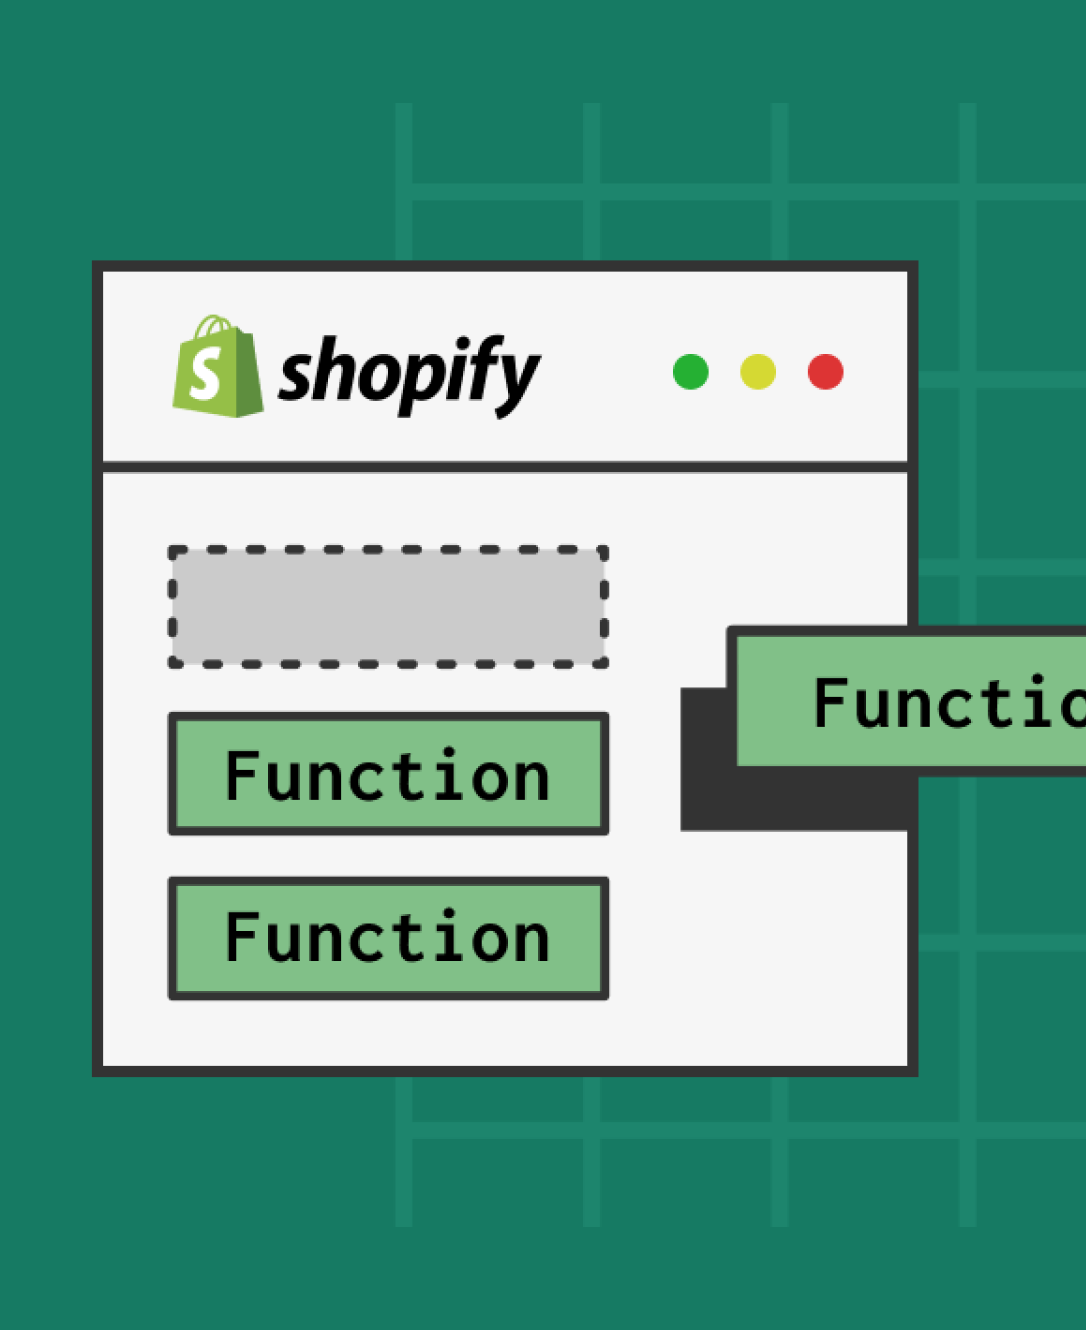
Shopify Functions are tools that allow developers to customize the backend logic of the Shopify platform. With “function extension targets”, developers can inject code into the backend of their Shopify environment, leveraging “WebAssembly” modules.
Essentially, each function is made up of a “function input”, “function logic”, and “function output”. The input is a JSON object which results from a GraphQL input query defined by the developer. They allow you to select the specific data you need for your function, such as cart line product data.
Function logic is the information you give your function in any language that can compile a WebAssembly module, meeting specific function requirements. Shopify has client libraries and templates available for both Rust and JavaScript.
Finally, the function output is a JSON document that outlines exactly what you want Shopify to do. Notably, Functions are available to all merchants on Shopify, not just Shopify Plus users. You can install Functions with an app, and sell them on the Shopify app store too.
How to Use Shopify Functions to Create Custom Experiences
In recent years, Shopify has updated the number of functions developers can access, and the way you leverage each solution varies slightly depending on what you want to accomplish. Fortunately, Shopify does produce step-by-step guides that tell you exactly how to use each function.
Before you start creating a “function”, you’ll need:
- A partner account with Shopify
- A Shopify development store
- An app using Shopify CLI 3.49.5 or higher
- Node.JS 16 or higher
You’ll also need to install your app on the Shopify development store. If you want to get started quickly, you can find “sample code” for Shopify’s functions within the tutorials for each function solution. You can clone the discount sample app, enter a name for your app project, then link your function to your app configuration to start making changes.
Here’s a quick guide to leveraging Shopify Functions for your store.
Step 1: Choose Your Shopify Function
As of the Shopify Winter ’23 edition update, there are a total of six Shopify Function options developers can choose from. These include:
- Discounts: With Shopify Functions, you can create a new type of discount to apply to a specific product or product variant in a customer’s cart. For instance, you could offer a volume discount to customers who purchase more than a certain number of products.
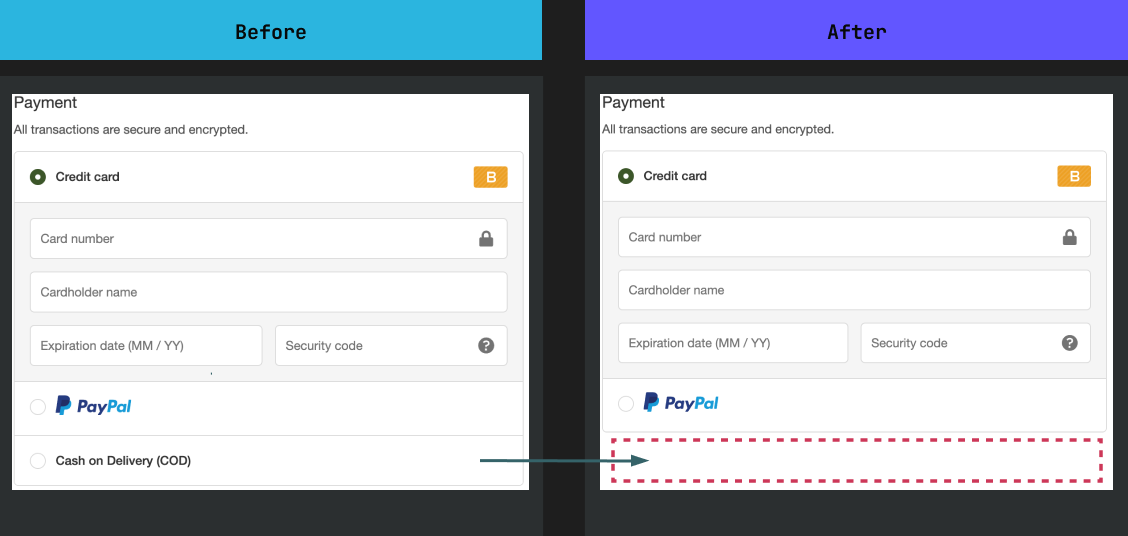
- Payment customizations: Shopify Functions allows you to customize the payment options you offer your customers on the checkout page. One of the most common ways to use this is to “hide” a certain payment option based on a dollar threshold. For instance, you might only want to give customers the option to checkout with BNPL if they spend a certain amount.
- Delivery customizations: With Shopify Functions, you can rename a delivery option offered to customers at checkout. For instance, you can configure your Shopify store to only show a certain shipping options (like pick-up or express delivery) to people who live in a specific area, or enter a certain postal code.
- Cart Transform: With this Function API, developers can create unique bundles for their customers. The Cart Transform function can also expand a bundled product into its individual components, making it easier to calculate taxes, shipping weights, and decrement inventory.
- Cart and Checkout Validations: This Function API ensures customers can only complete a purchase if their orders meet with certain rules. For instance, you might only allow customers to buy one new product during a launch event.
- Order Routing: The order routing API allows you to use Shopify Functions to choose specific order locations during checkout. You can create routing logic that makes sense for your business, avoiding issues like split fulfillment and speeding up delivery times.
Step 2: Follow Shopify’s Guides to Create Your Function
Once you’ve decided which Function you want to create, you’ll need to follow a slightly different process for each experience you want to create. However, most solutions will require you to use Shopify CLI to create “starter code” for your extension or application.
For instance, if you’re creating a product discount function, you can use Shopify CLI to build a starter function, then specify inputs using input query, and implement logic with JavaScript or Rust. Shopify offers a range of tutorials and step-by-step guides on its website, which will show you the type of code you’ll need to use, and what you’ll need to customize for each function.
Here’s a quick guide to creating a Payment Customization function:
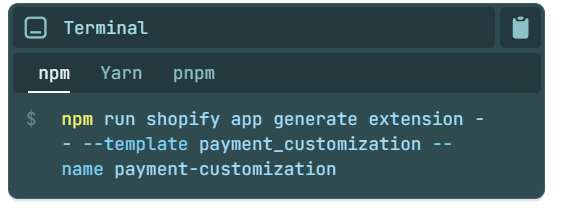
Start by using Shopify CLI to generate a starter function. Go to your app directory, and run one of the following commands to create a payment customization extension:
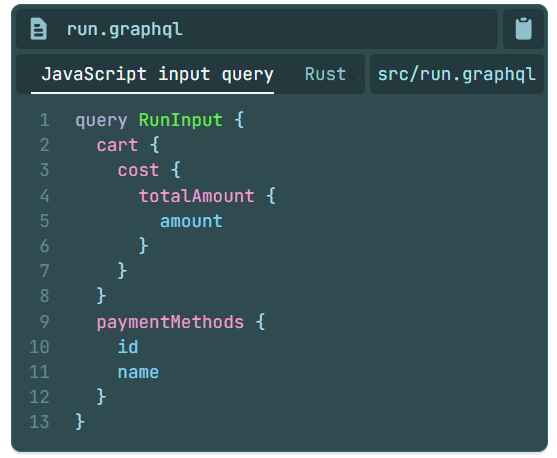
Next, choose the language you want to use for your input logic, and navigate to extensions/payment-customization. Replace the src/run.graphql file contents with the following code:
If you’re using Javascript, run the following command to regenerate types according to your input query: $npm run shopify app function typegen then replace the src/run.js file with the code provided by Shopify here.
Step 3: Previewing and Activating your Function
To preview your function, you’ll need to make it available on your Shopify development store.
To preview your payment customization function on a Shopify store, ensure you’ve configured build.watch for your function extension configuration. Next navigate to your app route, and use the dev command on Shopify CLI to start a preview.
Notably, you can keep the preview running while you’re working on your function. Shopify CLI will update the function’s extension drafts automatically, so you can test your changes instantly. Follow the prompts provided by Shopify CLI to install the app into your store.
Once you’re ready to activate your function, you’ll need to use GraphiQL. In the case of the payment customization function, you can use the paymentCustomizationCreate GraphQL mutation. You’ll be able to use the metafields on the payment customization system to configure the interface, and ensure your merchants can change the function themselves.
Step 4: Testing your Function
As any good Shopify developer knows, testing is the key to ensuring your solutions work exactly as they should. The way you test your Function will vary depending on the app you build for Shopify. If you’re creating a payment customizations function, you’ll need to:
- Log into your Shopify admin then click on Settings followed by Payments
- Check the option for Payment Customization to find the Hide payment method by cart total option you created with GraphiQL.
- In the Manual payments methods section, choose Add manual payment method then click on the option you want to hide.
- Click Activate then open your development store, and build a cart with a value under your defined total. The payment option should continue to display until you exceed your defined total, at which point it will disappear.
You can debug your function and review its output from within your Partner Dashboard too, by going to Apps> [your app name]> Extensions > Payment-customization.
Start Creating Custom Experiences with Shopify Functions
Learning how to use Shopify Functions to create custom experiences for merchants and shoppers is easier than you’d think. The Shopify Functions solution makes it simple to create custom discounts, order routing logic, checkout validation rules, product bundles and more. Plus, Shopify plans on adding new options for customizing experiences with Functions in the years ahead.
If all of this sounds extremely complicated, then you can find more resources and guides on the Shopify developer website. Alternatively, if you’re a store owner who doesn’t want to mess around with code on your Shopify website yourself, you can consider reaching out to a Shopify Expert.
At Storetasker, our Shopify experts have all the skills you’ll need to create highly customized and bespoke experiences on your ecommerce store. Contact us to start your project today.


Shopify Expert?


