How To Edit A Shopify Checkout Page: Simple Options
Shopify is one of the world’s most popular ecommerce platforms for a reason. Not only is the environment highly customizable and scalable, but it’s also wonderfully straightforward. The platform comes with virtually everything you might need to launch your online business, including a blogging system, connections to analytical tools, and a pre-defined checkout process.
For the average store owner, the standard Shopify checkout is a relatively effective tool, it’s fast and secure, and requires very little configuration on your side. However, since the checkout is one of the most powerful tools your store has, it might be worth investing a little extra effort into making sure it effectively portrays your branding, and converts your customer.
Fortunately, there are some simple ways to start adding different elements to your checkout page, without a lot of technical knowledge. Today, we’re going to take a look at what you can tweak on the Shopify back-end, and what kind of additional options you might consider.
How Customizable is the Shopify Checkout?
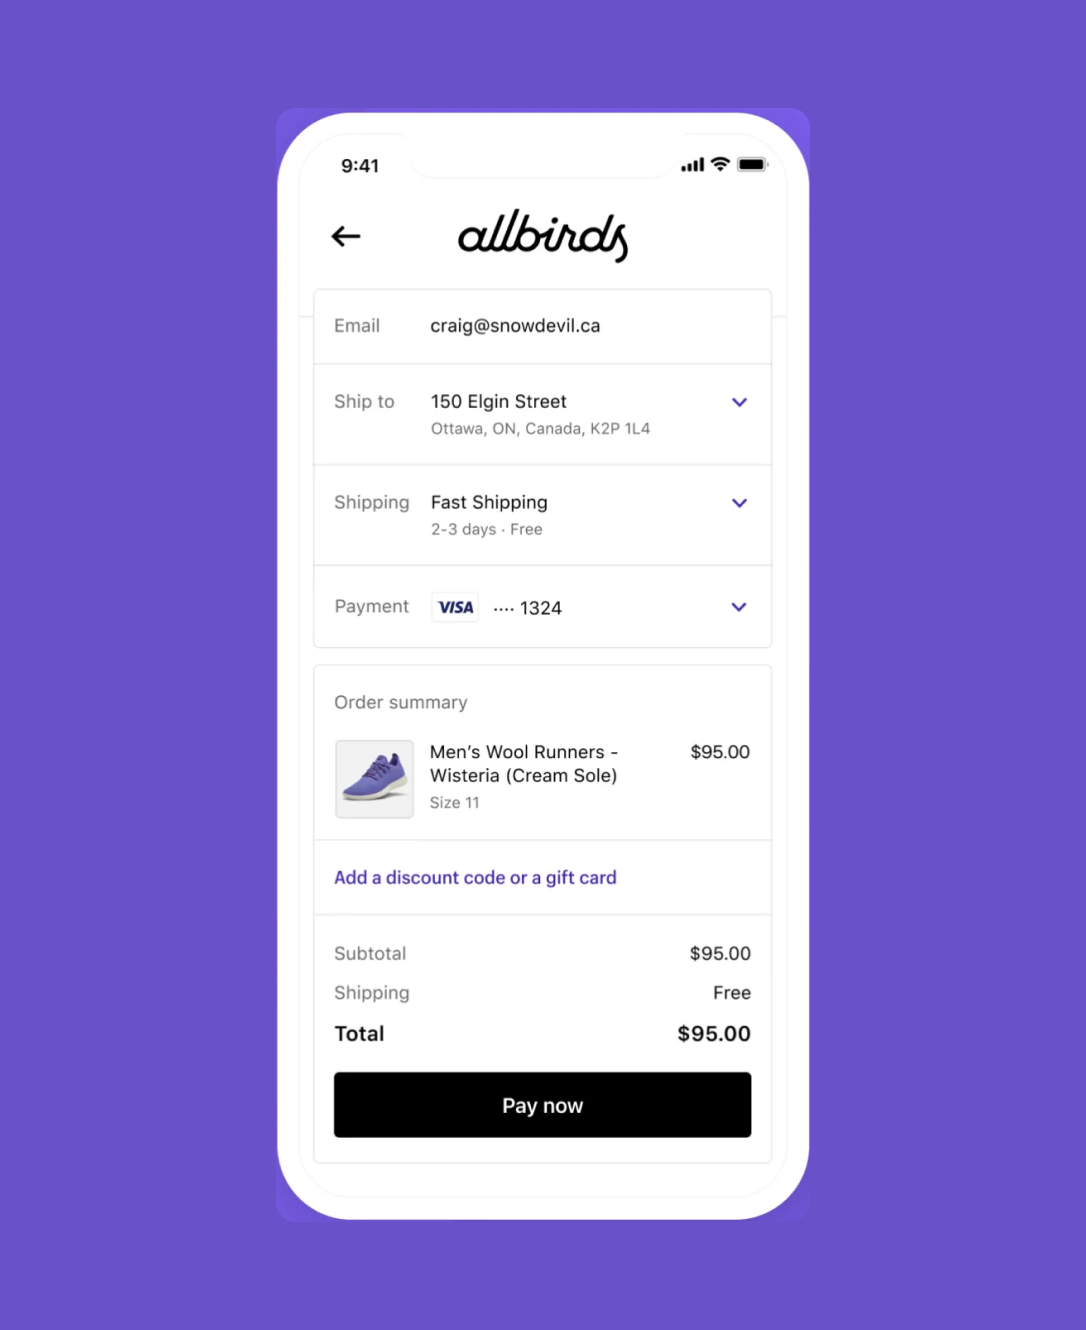
The first thing we should note is that while it is possible to edit aspects of your checkout with no coding knowledge, you’ll be a little limited on what you can customize without help. Most of the checkouts you’ll see powered by Shopify are pretty much the same. The pages are typically divided into two parts, with a section of form fields on the left, and the order summary on the right.
Currently, you won’t be able to change this structure and checkout logic, unless you’re able to really dive into Shopify Plus for differentiation purposes. Shopify Plus merchants can change a lot more of their checkout experience, by editing the .liquid template. However, doing this can be risky if you don’t have a lot of prior Shopify knowledge, so we’d always recommend working with an expert.
The last thing you want to do is accidentally damage the performance of your website in a way that makes it impossible for customers to complete transactions.
Notably, you may be able to make additional changes to your Shopify checkout without upgrading to Shopify Plus by using the apps on the Shopify store. However, you’ll still be limited if you’re not willing to dive into code.
How to Edit Your Shopify Checkout Page
The easiest way to edit your Shopify checkout page is to simply enter the backend of your Shopify admin account. When you’re customizing your checkout within the Shopify settings, you won’t be able to change the basic layout, but you will be able to alter how the experience looks.
Start by logging into your Shopify dashboard, and click on Settings > Checkout. Click on the “Style” section, and select “Customize Checkout” to enter the theme editor. Once you’re in the theme editor, here are the things you’ll be able to do:
- Upload a banner image: The top of each Shopify checkout page includes a banner showing your name. You can choose a background image for that banner which reflects the style or identity of your business. Your image should be at least 1000 x 400 pixels.
- Add a logo: Adding a logo to your checkout page is one of the best ways to provide your customers with a consistent and professional experience. In the “Checkout” section, click on the Logo option to upload your image. You’ll be able to select a position for the logo, and select the size you want your logo to be. Make sure the image is high quality.
- Change background images and colors: While you can’t alter the structure of your Shopify checkout, you can adjust its appearance with background images and colors. Within the “Main content area” section, select a color that matches your brand, or upload an image. If you upload an image, you’ll need to ensure it’s high-quality, to avoid any pixelation. The image will repeat vertically and horizontally if it’s too small.
- Update form fields: You’ll also be able to change the color of the form fields, to make them transparent or white. If you’re using a background image, a transparent set of form fields will ensure your image can show through correctly.
- Add a background image to order summaries: When a customer clicks the “Show order summary” option on your checkout page, a list of products will appear. You can add a color or image to the order summary to make it more unique to your brand. Make sure you preview the appearance of the image or color to ensure it looks good.
- Change typography: While there’s a limited number of fonts you can use in the checkout page, you will be able to choose which one works best for you. Under the “typography” section in the checkout page, scroll down to select a different font for the headings and body text. Save your changes when you’re done.
- Add alt text: If you’re adding images to your checkout page, it can be helpful to improve the accessibility of the design, by including alt text. Under an image, simply click on the “update” button, then enter the alt text you want to use.
- Adjust Button and accent colors: You can also change the accent colors and button shades used throughout your checkout page. Clicking on “colors” will allow you to select a color for errors, accents, and buttons using a color picker tool. You can also enter a hex code.
Editing the Post-Checkout Page
Aside from editing the primary checkout page on Shopify, you’ll also be able to make changes to the post-checkout page, or the thing your audience sees after they complete a purchase. Shopify will allow you to add content like up-sells, cross-sells, offers, and customer surveys to your page.
However, in order to do this, you will need to install and configure one of the checkout apps offered by Shopify. There are a handful of different options available depending on what you want to accomplish. Each app offers its own functionality, so make sure you take the time to sort through all of your options before you dive in.
Adding Code to the Checkout File
As mentioned above, if you have a Shopify Plus account, you can make changes to the checkout.liquid or CSS files. These will be available within the “Theme” section of your store, when you click on the “Edit Code” option. When the menu shows, click on the checkout.liquid, or css file to make the necessary updates.
Notably, if you’re not familiar with using liquid or CSS code to edit Shopify content, you might benefit from speaking to an expert at this stage. It’s also worth creating a backup of your checkout code just in case anything does go wrong.
Editing a Shopify Checkout Page: Other Options
As you can see, while there are a number of ways to edit your Shopify checkout page built into the platform, you’re mostly limited to making a handful of stylistic changes. This is, of course, unless you have a Shopify Plus merchant, and you’re happy working with code.
However, there’s also an alternative option for adding more functionality and capabilities to your checkout: the app store. The Shopify app store includes numerous plugins and add-ons which are custom-made to enhance the checkout experience. You can use these tools to implement:
- Countdown timers: Countdown timers are great when you want to increase urgency among your users in your online store. Apps like Fera.ai can introduce “countdowns” to your store which let your customers know exactly how long they have to get a specific deal or finish entering their details. Just be careful not to be too pushy.
- Trust signals: Trust signals like security buttons and banners for payment methods can significantly improve your chances of conversion. You can use apps like TrustedSite to implement payment safety buttons onto your store’s checkout page in seconds. You’ll also be able to add trust signals to the post-checkout page.
- Cross-selling and upselling: Cross-selling and upselling features, like carousels showcasing related products and offers can improve your average order value. You can find apps which allow you to add this functionality to your Shopify store without implementing any extra code. You can even personalize offers to each customer.
There are a number of ways to update and edit your Shopify checkout if you’re willing to do the work. However, you’ll find you always have a lot more options, and much more flexibility working with a Shopify Expert. Contact Storetasker today to find the right person for your project.


Shopify Expert?


