How to create a product slider with virtual reality and augmented reality capabilities on Shopify
Alright let's do this! Here's the entire tutorial on how to create a product slider with virtual reality and augmented reality capabilities on Shopify.
Let's start with some knowledge pre-requisities:
Pre-requisites:
- Knowledge in liquid, HTML, CSS, and JavaScript.
- 3D models of a product in .glb format.
Step One:
Upload the 3D models as media for a product. Just upload the 3D model as a regular image; Shopify is compatible with 3D models.
Step Two:
Download this file into the assets folder of your theme and name it “hand.png”. Then, download this file into the assets folder of your theme and call it “ic_view_in_ar_new_googblue_48dp.png”. Finally, create a new section file and paste the following code.
Step Three:
Go to the customizer, add a new section (i.e., on the homepage), select “Product VR Preview”, click on the section and select the product with the 3D models you uploaded. Save it.
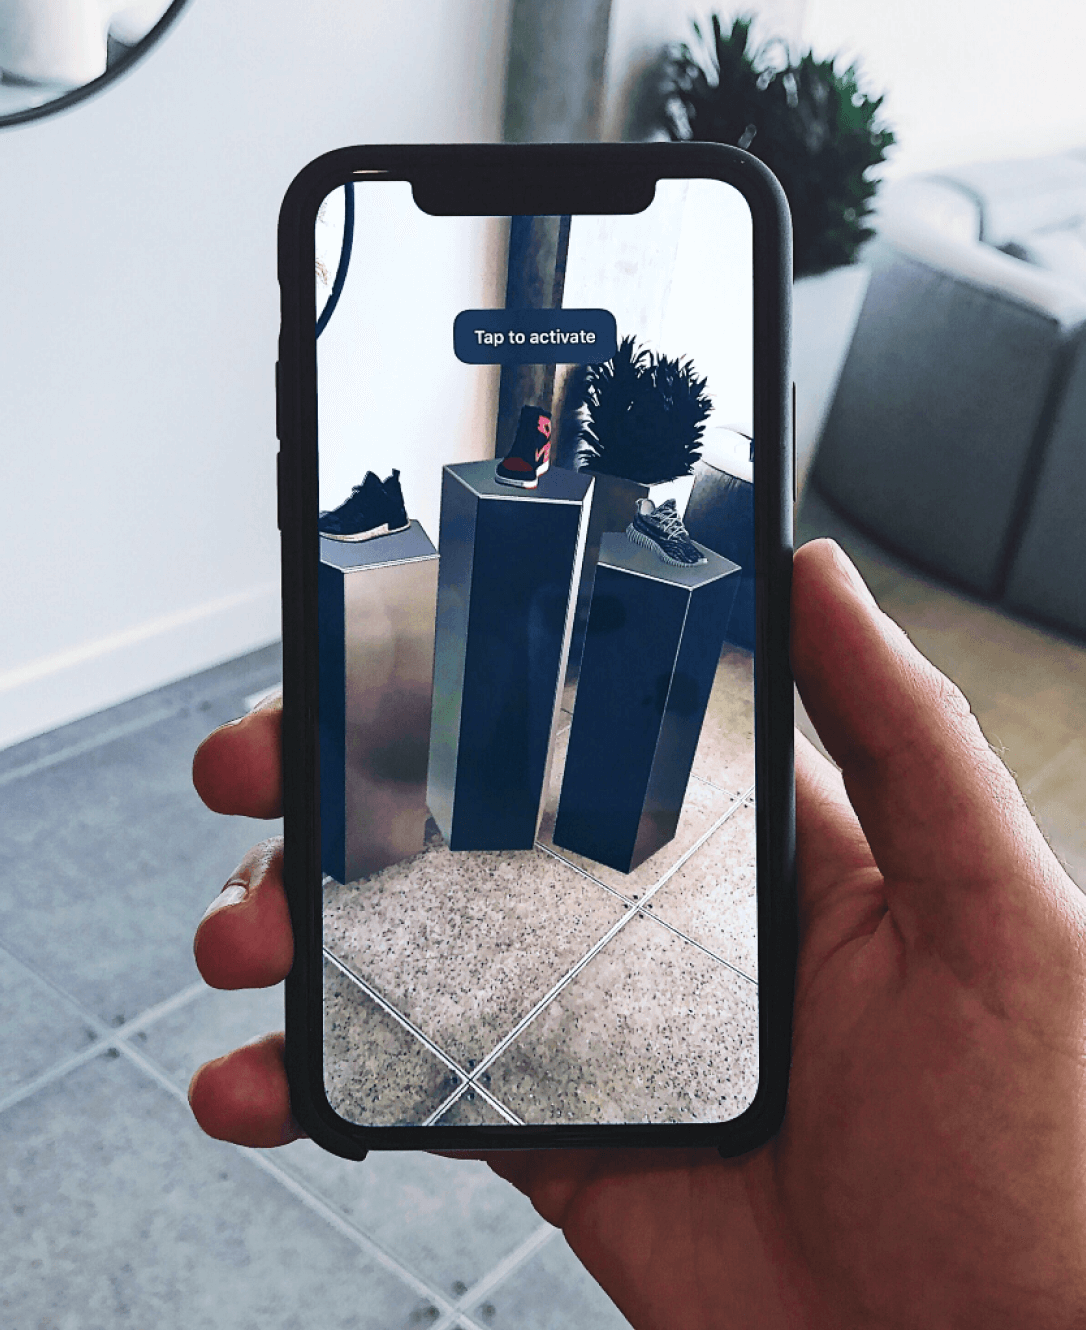
Voila! Now your homepage should get a slider section with AR/VR features.
Code explanation:
This part creates three variables: ProductVRSources, ProductVRSourcesIos, ProductVRPosters, and firstModel.
ProductVRSources: It will save all the .glb files URLs attached to the product you selected in the customizer.
ProductVRSourcesIos: It will save all the 3D model URLs for IOS compatibility.
ProductVRPosters: This will save the preview images of the 3D models from being used when a .glb file fails to load while a .glb file is loading and for the slider buttons' background images.
firstModel: The first 3D model we will show in the slider.We loop through the product you selected in the customizer media; if it finds a 3D model, it will save the .glb file URL, the IOS-compatible 3D model URL, and the 3D model preview image URL. When it finds the first 3D model, it will save the media object for that 3D model.
This code will create a model-viewer tag for the first 3D model of the product you selected in the customizer, so you can see the 3D model with virtual reality and augmented reality.
We create the model-viewer tag with the following attributes:
Shadow-intensity: Controls the opacity of the shadow. Set to 0 to turn off the shadow entirely.
Ar: It triggers the augmented reality option on mobile devices.
Camera-controls: Enables controls via mouse/touch.
Touch-action: Allows touch users to scroll the <model-viewer> element vertically but can interact if their gesture starts horizontally.
id: The id for the model-viewer tag.
The first button will represent the button that will trigger the augmented reality functionality on mobile devices.
The second element, the div, will trigger once the user enters the augmented reality functionality to show the user how to use the AR feature.
The final button will show only if there is an error loading the AR functionality.
This code will create the slider buttons. Then, we simply loop through the 3D models' preview images, create a button for each one with the background image set to said preview image, and attach a javascript function to the on-click event of that button.
Once the DOM content is loaded, we save the model-viewer DOM element in the variable modelViewer, save the slider wrapper DOM element in sliders, and the #ar-button, #ar-prompt, and #ar-failure elements DOM elements in their respective variable.
After that, we append the buttons and the slider to the model-viewer DOM element. Again, we need this to live inside the model-viewer tag, not outside it.
After that, we load the liquid ProductVRSources, ProductVRSourcesIos, and ProductVRPosters variables in their respective javascript variables as comma-separated arrays and remove any empty rows.
After that, we create the switchSrc function (attached to the slider’s buttons). Inside this function, we calculate the position of the button’s model and load the model, the IOS-compatible model, and the model preview image into the model-viewer tag.
Then, we load all the slide's DOM elements in the slides variable. Next, loop through each slide to remove the selected class and add the selected class on the slide selected.Finally, we listen for the model-viewer viewer to be fully loaded to add an event listener to the slider, listening to the beforexrselect event and preventing its default behavior. This will keep the slider interactions from affecting the XR scene.
This simply creates a new section in the theme, attaching the class product-vr-wrapper to it and inserting and input of type product so you can select what product’s 3D models to showcase.
The code left is plain and old CSS to make your slider look great.
If the 3D models look blurry, try to adjust the height and width of the model-view tag (second rule in the CSS).


Shopify Expert?


