How to edit Shopify theme files directly with the code
In a previous blog, we discussed how designers and business leaders alike could edit the appearance and functionality of their Shopify store using the Shopify theme editor. The theme editor offers users one of the easiest ways to customize their store experience, because it requires virtually no coding or programming knowledge. You can perform most edits with a couple of clicks!
However, while the theme editor is convenient, it can also be restrictive. You’ll be limited to what you can realistically change without diving into the code associated with your theme. That’s why many individuals with basic design and development skills prefer to use the Code Editor.
The Shopify Code Editor is an easy-to-access tool within the Shopify ecosystem, which you can visit directly from your theme page. Just click the three dots in the upper left corner when clicking into your theme, and select “Edit code”.
Here’s what you need to know about using the Code Editor to customize a Shopify store.
What to Expect from the Shopify Code Editor
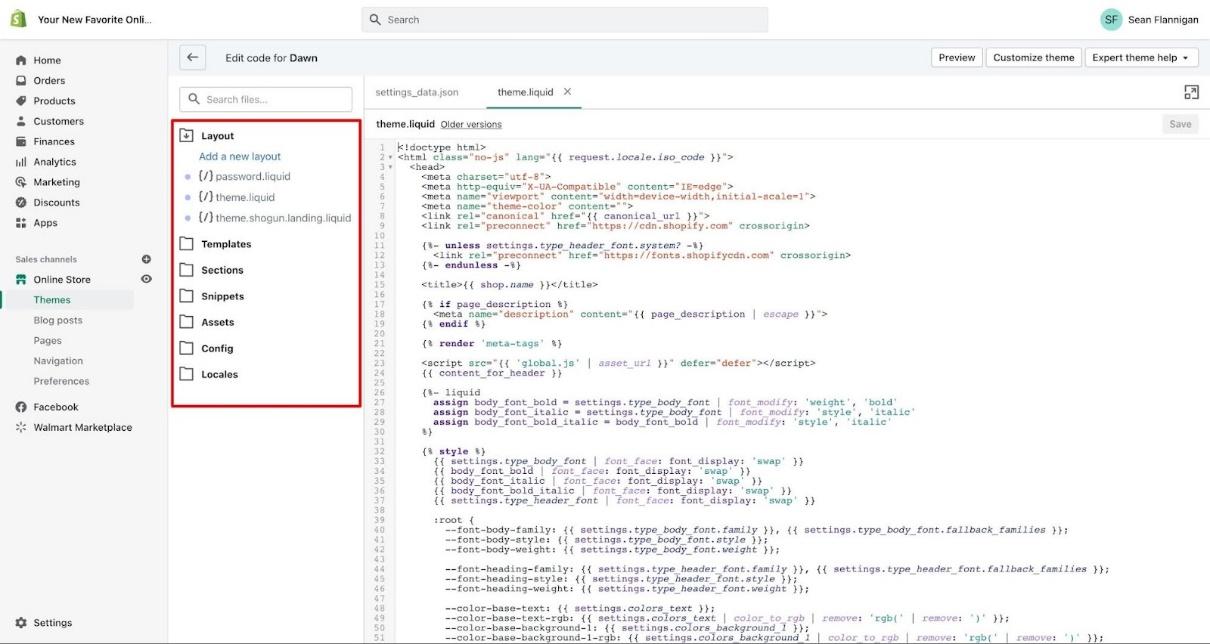
As mentioned above, you can visit the Shopify Code Editor directly from a theme, or from your Shopify dashboard by clicking on Themes > Actions > Edit Code. Once you arrive in the Code Editor, you’ll see 7 folders:
- Layout
- Templates
- Sections
- Snippets
- Assets
- Config
- Locales
These folders house the various files included in your theme which determine how content is displayed on a store page. Clicking into each file will open them as new tabs within the editor, so you can go back and forth between tabs while you work.
Let’s take a closer look at what you can do with some of the tabs:
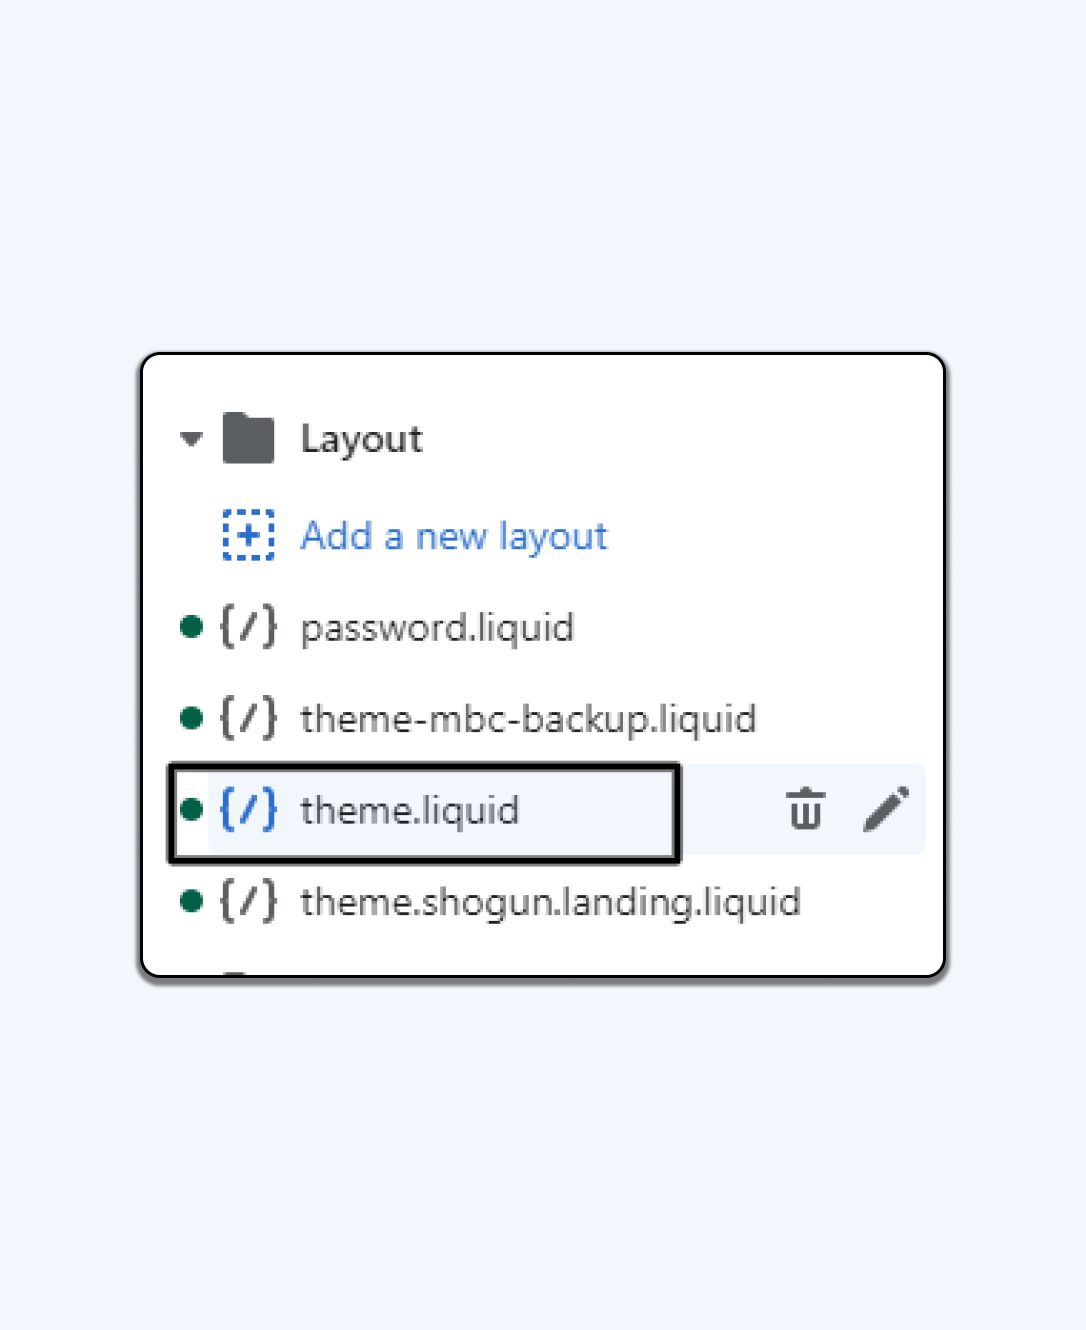
- Layouts: This folder contains the master theme.liquid file for your theme. It hosts all the repeated elements of the theme, including footers, headers, and navigation menus.
- Templates: This contains all the page templates for your store, controlling which each page will show. Your selection of templates will vary depending on your chosen theme. Each template file includes snippets, one or more sections, and HTML.
- Sections: Sections on Shopify are the individual customizable components of each page template. You can move, add, or customize sections to adjust your layout. When you make edits to a section, the changes will show across your entire site, wherever the section is used.
- Snippets: Within the Snippets folder, you’ll find Liquid files with reusable snippets of code which can be placed throughout your theme. When you change the snippet code, the change will appear on all templates and pages using the snippet.
Tips for Editing Shopify Theme Files with Code
The most important thing you can do before editing your Shopify store with either the Theme Editor or Code Editor is backup your store. You don’t want to change things without having a record of what everything looked like before.
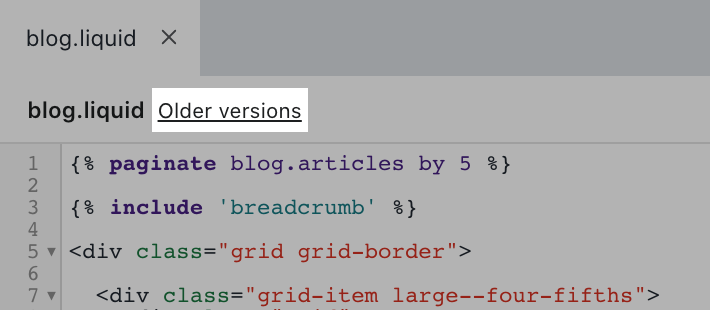
Having a backup will also mean you can revert to your previous theme design without too much effort. However, you can “roll back” .liquid files individually by clicking on “Older Versions”, next to the .liquid file name in each folder. Clicking on the dropdown menu will give you a list of time stamped dates you can roll the code back to.
To save a complete clean version of your original theme (just in case), duplicate it first. You can do this by going into your Online Store section on Shopify, clicking on Themes, then Actions > Duplicate. This will create a copy of your theme in your theme library.
Here are some more quick tips to help with your editing process.
- Use Shopify Guidance to Help You
One of the things many Shopify developers and designers love about the platform, is how much documentation and guidance it has to offer. If you’re not working with a Shopify developer, and you don’t have developer knowledge yourself, you can still find help on the Shopify website.
There are a handful of customization tutorials available from Shopify, which are tailored to suit different “theme architectures”. It’s also worth brushing up on some .liquid, CSS, and HTML skills if you are a Shopify developer before you start working with code.
- Use Comment Code to Track Changes
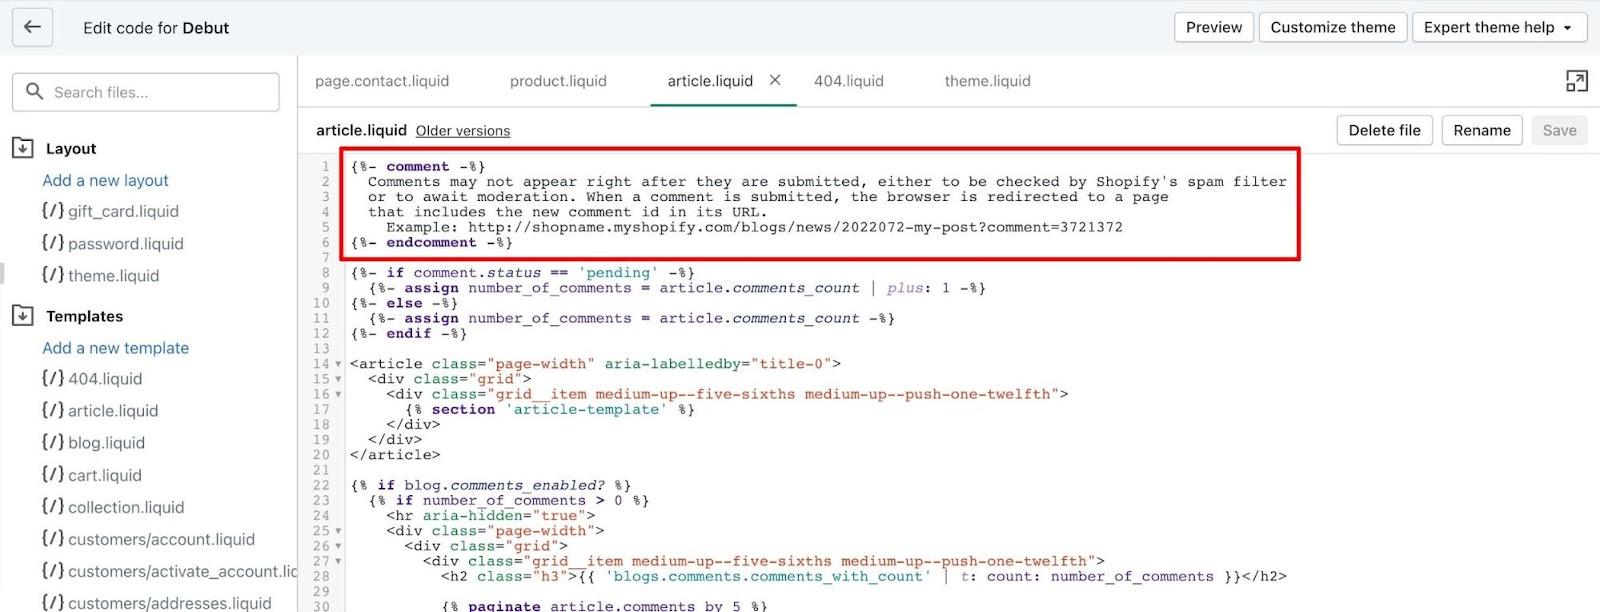
If you plan on frequently updating and customizing your theme files, it’s worth keeping track of all the changes you’re going to make. One way to do this is to create a simple spreadsheet or document where you can track everything that has been altered in the code. However, you can also leave comments within the code of your Shopify theme files.
You can place comments between “comment tags” in liquid files, so you can always check in on who made a certain change, or why it was made in the future.
- Try Quick Customizations with CSS
If you’re concerned about diving too deep into the liquid landscape, it might be helpful to begin with customizing your CSS theme files. CSS files allow you to make changes to the appearance of your store, and you minimize your changes of breaking your code.
You can edit the CSS files directly within the Shopify code editor, by clicking into them individually. However, you will need to have some basic knowledge of CSS. If you’re not sure how to work with either CSS or liquid, your best option could be to simply hire a Shopify designer or expert.
- Use the Inspect Function
Any developer or designer on Shopify (or virtually any other platform) will know that it’s difficult to know for certain how code changes will influence the appearance and functionality of a store. Fortunately, there are free tools available which can help you to preview your changes before you commit to them. For instance, if you’re using a Chrome browser, you can use the “Inspect” option.
Simply right click on the element you want to inspect on your store, and select the “Inspect” option. A pane should appear on the right-hand side or bottom of your screen, Within the “styles” section, you can make direct changes to the page you’re viewing in CSS, and use HTML to change how the content is displayed on the page. With these experiments, you can see exactly how the page would look and perform with minor changes, without altering the code.
- Make Small Incremental Changes
Every theme available for Shopify comes with a specific set of features and capabilities, designed to support the requirements of different types of stores. For instance, some themes are created to host massive catalogues of products, while others are intended to be particularly mobile friendly.
When you start making visual changes to your store with the Shopify code editor, there’s a risk you could end up influencing the functionality of the theme too. That’s why it’s so important to make small changes, one at a time, so you can check exactly how they influence your store. If you only make incremental changes, it’s easier to roll something back if your code tweak leads to an error.
Editing Your Shopify Store with the Code Editor
Editing your Shopify store with the code editor is a little more complex than simply making basic changes with the built in Theme Editor. However, it does give you more freedom to make changes to the appearance and functionality of your store on a greater scale.
Customizing your store can help you to develop a more unique experience for your audience, but it’s worth remembering that editing your theme could mean you can’t take advantage of automatic updates and enhancements when they roll out. You’ll need to be prepared to make changes manually yourself with some theme solutions.
If you’re worried about diving into Shopify code, or you don’t know how to manage the combination of HTML, CSS, JSON, and JavaScript (as well as Liquid) included in some themes, it’s best to work with a Shopify Expert.


Shopify Expert?


