How to Add New Fonts to Shopify: Custom and Google Fonts

Learning how to add new fonts to Shopify can be more helpful than you’d think.
Compared to other branding assets, such as your color palette and logo, it can be easy to overlook the importance of the right typography on your Shopify store. However, a good font isn’t just good for your brand image, it’s crucial to delivering a great user experience too.
The good news for Shopify store owners is that Shopify already offers a wide range of high-quality, legible, and clear fonts for you to choose from. However, if you really want to make your site stand out, the basic options can be a little limited.
Today, we’re going to walk you through the basics of adding new fonts to your Shopify store, both from Google Fonts, and from your own custom font directories.
How to Find Existing Fonts on Shopify
Before we start looking at ways to add your own custom fonts to Shopify, it’s worth making sure you know how to find your fonts on the platform in the first place.
Remember, fonts are more important to your store design than you’d think. An engaging, easy-to-read font can improve your customer’s purchasing experience, and keep customers on your site for longer. Being able to browse through and change the fonts on your Shopify store pages, checkout page, and other assets is essential to making the right impact on your audience.
The good news is that finding your Shopify fonts is pretty straight forward, once you’re familiar with your Shopify dashboard and editing features. To start, navigate to your Shopify theme editor by logging into your Online Store, then clicking on “Themes” followed by “Customize”.
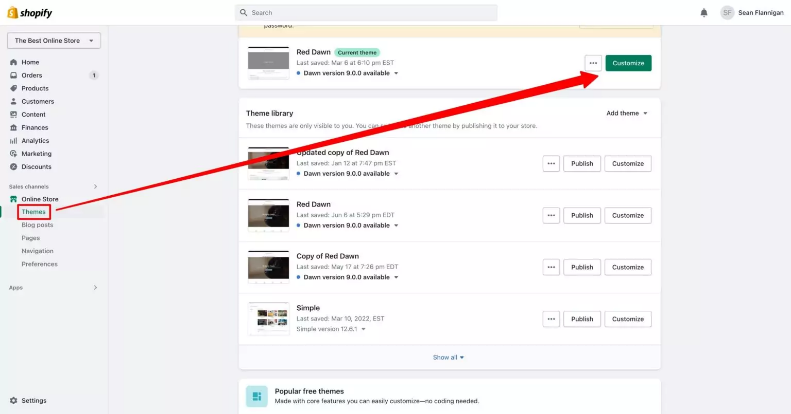
The Customize button will take you to the theme’s editing dashboard, where you can change the look of your store, and select your preferred font. On the left-hand menu that appears, click the paintbrush icon for Theme settings, and select “Typography”.
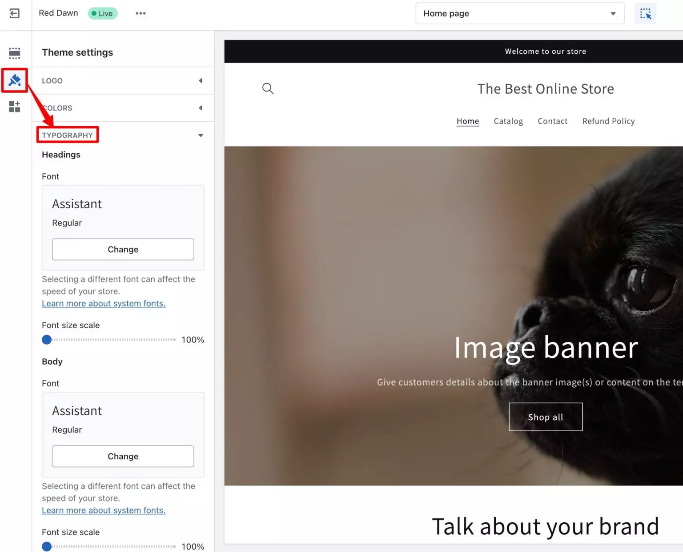
Now you can adjust your theme font settings. Click the “Change” button to update the font for your headings and body text. You’ll also be able to change the sizes for each piece of text, and adjust font weights too. Remember to save and update your store after making any changes.
How to Add Google Fonts to Shopify
If you’re not fully happy with the range of fonts on offer from Shopify, one of the best ways to update your font selection with options you know will work in a digital format, is with Google fonts.
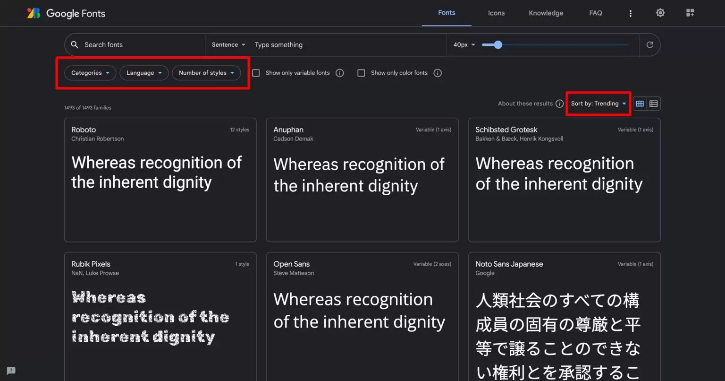
Google fonts are guaranteed to be accessible, inclusive, and easy to read on any platform. To add these fonts to your Shopify store, start by visiting the Google Fonts site, and selecting the font you want. You’ll be able to search through options with a few different criteria, including category, language, most popular, properties, and name.
Next, click on the font you want, and you’ll be able to check out the glyphs, explore the licensing options, and adjust the font size. You can also see examples of fonts your chosen typography might work well with. Once you click on the “Select this Style” button, a pop-up will appear with code you can copy for your Shopify store.
Copy the code, then head back to your Shopify store. Click on “Online Store”, then “Themes”, “Actions” and finally “Edit Code”. Scroll to the “Layout” section, and click on “theme.liquid”. Then scroll down to the </head> tag and paste your code just above it.

Remember to save your code when you’re finished!
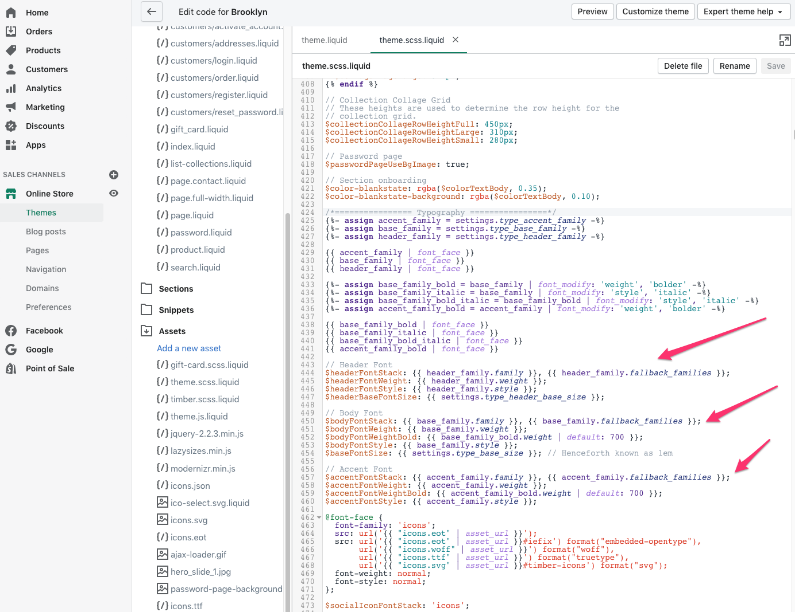
Go back to the “Assets” folder in your theme, and you’ll find two different style files, named “timber.scss.liquid” and “theme.scss.liquid”. Open them both.
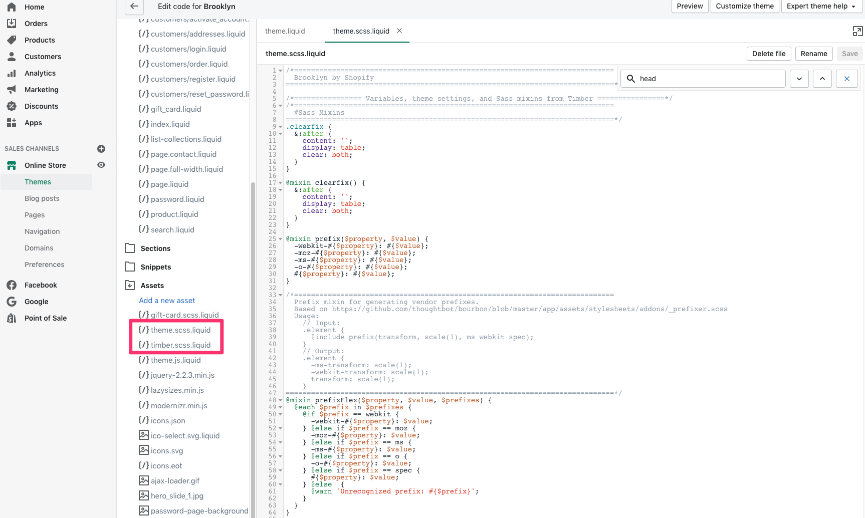
Go back to the page for the Google font you’ve chosen, and copy the font name. You can then return to your style files and scroll down to the “typography” section to replace the $headerfontstack, $bodyfontstack, and $accentfontstack lines.
How to Add Custom Fonts to Shopify
You’re not limited to exclusively using Google fonts if you want to update your Shopify theme with some new assets. You can also add some custom fonts to your store, although you might find that you need some extra coding skills to do this.
We recommend backing up all of your theme files before you jump in, to ensure you don’t end up damaging anything in the process.
To install a third-party font, you’ll first need to purchase, or download the font you want to use. Make sure you choose a compatible file format for Shopify, such as SVG, TTF, EOG, WOFF, or WOFF2.
Once you have your font, go to your Shopify dashboard, and click on “Online Store”, then “Themes” then “Action” then “Edit Code”.
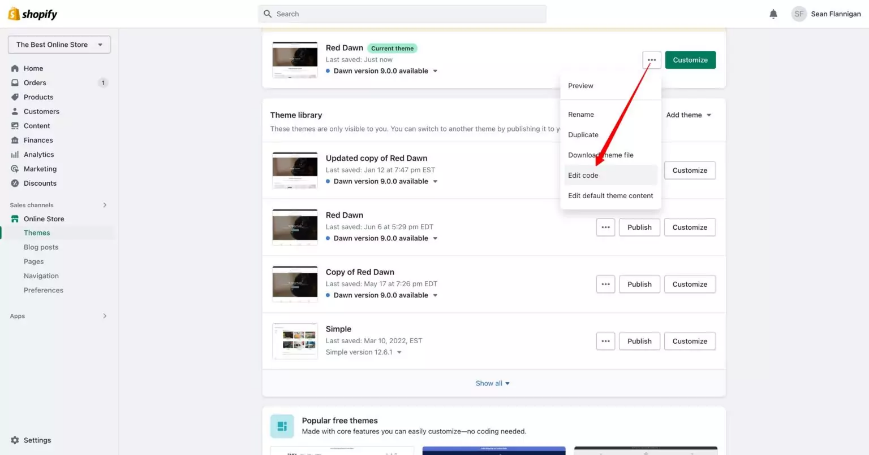
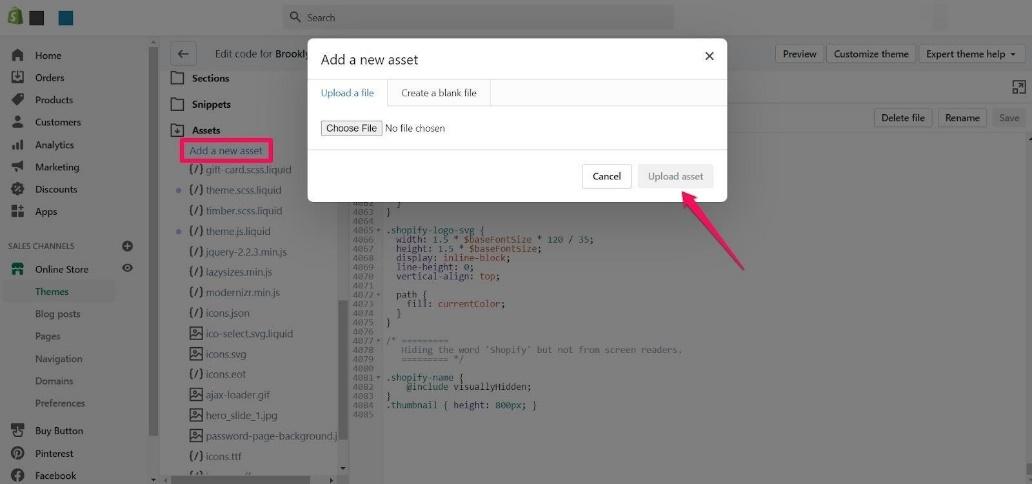
You should be met with the standard Shopify code editing dashboard. Scroll down to “Assets” in the sidebar, and click on “Add New Asset” then “Upload” to install your font files. Don’t make any changes to the code during this process.
Once you’re done, open the theme.scss.liquid file in the “Assets” section, and scroll to the bottom of the code. Then paste the following code into the text box, changing the word “Font” with the name of your font:
@font-face {
font-family: “FONT”;
src: url(‘{{ “FONT.eot” | asset_url }}’);
src: url(‘{{ “FONT.eot” | asset_url }} ?#iefix’) format(“embedded-opentype”),
url(‘{{ “FONT.woff” | asset_url }}’) format(“woff”),
url(‘{{ “FONT.woff2” | asset_url }}’) format(“woff2”),
url(‘{{ “FONT.ttf” | asset_url }}’) format(“truetype”),
url(‘{{ “FONT.svg” | asset_url }} #FONT’) format(“svg”);
}
Make sure your font name is exactly the same as the one used on your files. You may need to add or remove sections from this code depending on the type of files you’re uploading.
Below this snippet of code, add the following lines for the types of text you want to change, such as headers, or body text, and again replace “Font” with your font name:
h1, h1 a, h2, h2 a, h3, h3 a, h4, h4 a, h5, h5 a, h6, h6 a, #nav li a, div.title a, .headline, .subtitle { font-family: ‘FONT’ !important; }
Finally, save your changes, and check that everything works.
Other Ways to Change your Shopify Font
If all of these steps seem a little overwhelming, don’t worry, there are some other, slightly easier ways to update your Shopify fonts. One option is to turn to the Shopify app market. There are a handful of excellent apps available, such as:
- Fontify: Change any font or whole or part of your web page in no time with Google fonts and custom fonts, without complicated coding. The solution is also compatible with the majority of top Shopify themes and apps.
- Fontio: A stress-free way to add Google or custom fonts to your store without any coding. You can apply fonts to custom classes, tags, and different themes in seconds, with absolutely no programming knowledge or developer help.
- Use Google Fonts: A straightforward tool from RoarTheme which allows business owners to add custom fonts and Google fonts to their store without coding. The solution also works with most Shopify themes and custom themes.
Just remember, Shopify apps aren’t always guaranteed to offer the best results. It’s worth double-checking the reviews and making sure you can get support with any issues before you dive into downloading an app, even if it’s a free option.
Alternatively, if you don’t want to rely on weighing your store down with extra apps, and you don’t have the coding knowledge or expertise to experiment with themes yourself, you can always access the help of a Shopify expert. A Storetasker Shopify expert will be able to help you create a user-friendly, unique, and on-brand site in no time, with all the custom fonts you like.
Contact us today to find out more about hiring your own Shopify expert.


Shopify Expert?


