How To Create A Custom Contact Page On Shopify

Love for online shopping is growing year after year.
In fact, by 2027, the market for ecommerce is expected to be worth around $27.15 trillion. That’s clear evidence that people today are happy to do their purchasing on the web.
However, while online shopping is streamlined, convenient, and relatively straightforward, it doesn’t always go according to plan. To reduce the risk of returns and negative customer experiences, ecommerce store owners need to ensure they’re taking numerous steps to support their audience. That means building strong FAQ pages where customers can find answers to questions about shipping and delivery, designing informative product pages, and of course, having a contact page.
A custom contact page on Shopify is how you ensure your customers can always reach out to you with any questions they might have about products, services, or issues.
Here’s everything you need to know about setting up your contact page.
What to Include in a Custom Shopify Contact Page
A contact page is more than just a checklist item for Shopify store owners. It’s a way of building trust with your target audience. When customers know they can actually reach out to you with their queries, they’re more likely to believe in the professionalism of your brand.
A great contact page differentiates you from your competitors, by showing customers you value their input. It also gives you a chance to collect useful information about what your customers like or dislike about your brand. Plus, if customers can contact you with any questions they have, they might be more likely to buy something from your company.
So, what should a Shopify contact page include? There’s no one-size-fits-all strategy for success, but in most cases, you should ensure your page features:
- All of your relevant contact information: Include as much information as you can about how customers can get in touch with you. You could add a map to show where your physical address is located, as well as a phone number and email address. Business opening hours can be helpful too, alongside social media links.
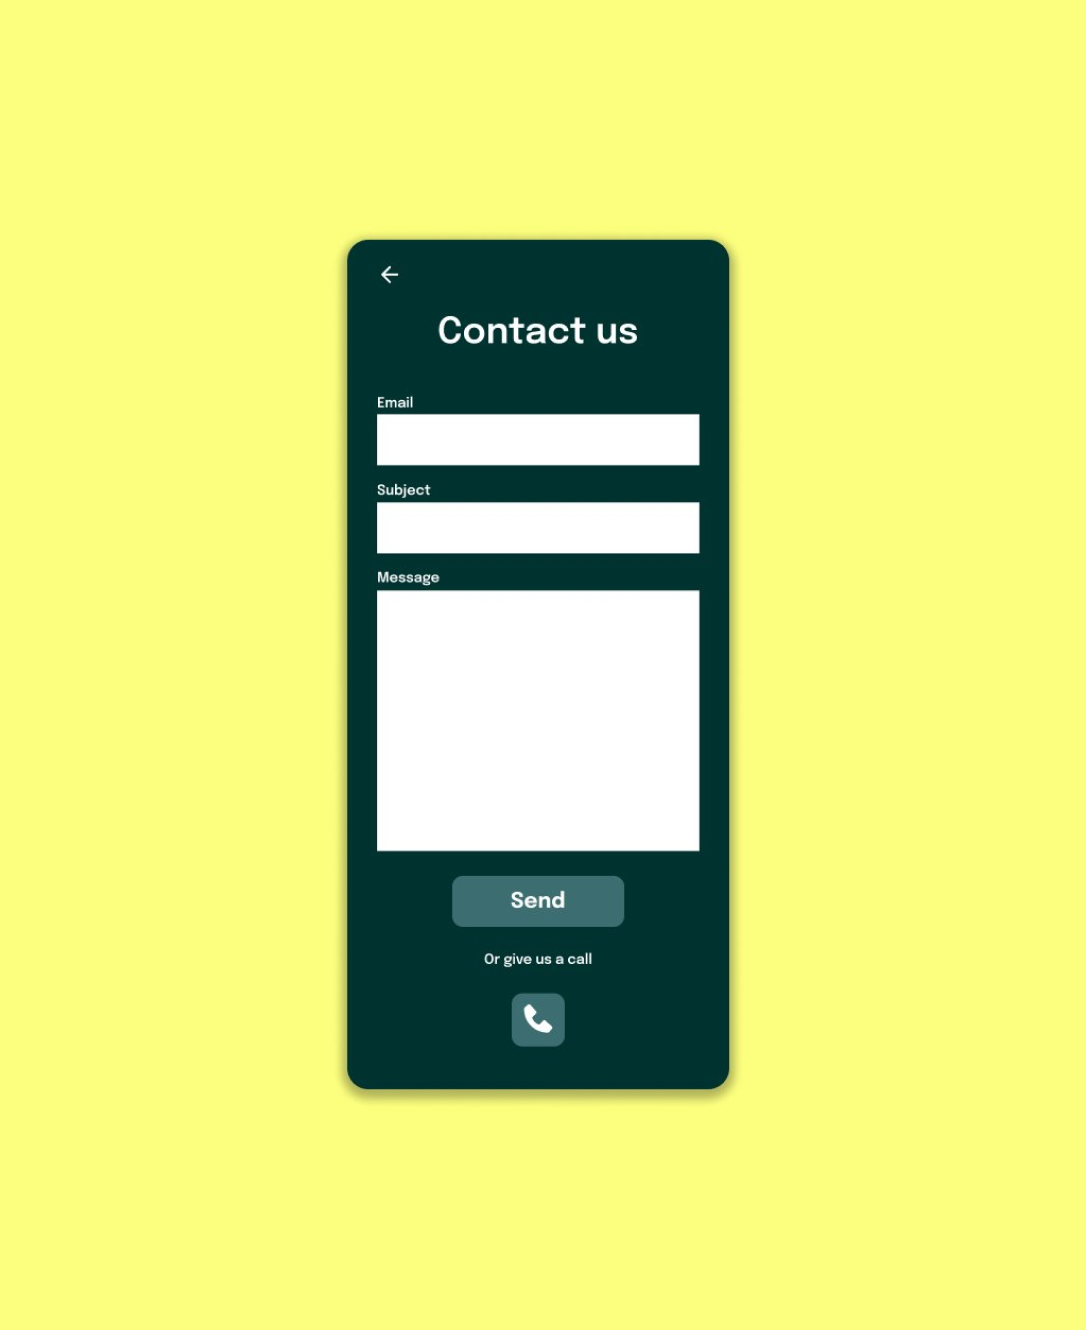
- A contact form: Although your customers can choose to contact you in a range of different ways, it’s usually helpful to have a form they can use to send a message there and then. It’s relatively easy to set up a simple contact form on Shopify.
- Links to helpful resources: In case your customers want to help themselves, it’s worth including links to your blog posts, FAQ pages, and any other resources or articles they might find helpful somewhere on your contact page.
- Customer reviews: A good contact us page will provide insights into your brand personality and what makes your company special. A message from your company, as well as some customer reviews and other forms of social proof can be very useful.
- A Call to Action: A call to action is a great way to tell your customers what their next step should be in interacting with you in a simple way. Even a simple button could be helpful, to let customers know how to submit a message.
- ReCAPTCHA: Although it might not seem necessary at first, adding a ReCAPTCHA element to your page will be essential as your business grows. It ensures you won’t end up with too many automatically generated messages from bots.
It might also be worth taking a few steps to make your contact page more user-friendly. For instance, you could enable auto-fill options for your customers so they don’t have to waste time entering their name and email address. A mobile-friendly experience is also a must, as today’s customers are spending a lot more time shopping online through their phones.
How to Create a Custom Contact Page on Shopify
There are a few ways you can create a custom contact page on Shopify, but the easiest option is to simply use the tools already embedded into the site builder. You don’t even need to know any code to get started, just head into your Shopify admin account, and click on “Online Store”, then “Pages”.
Once you arrive on the “Pages” section, you can find your default contact page (included within your theme), by searching for “contact”, or you can create a new page to replace it.

To create a page, simply click the “Add Page” button on the top right of the screen.
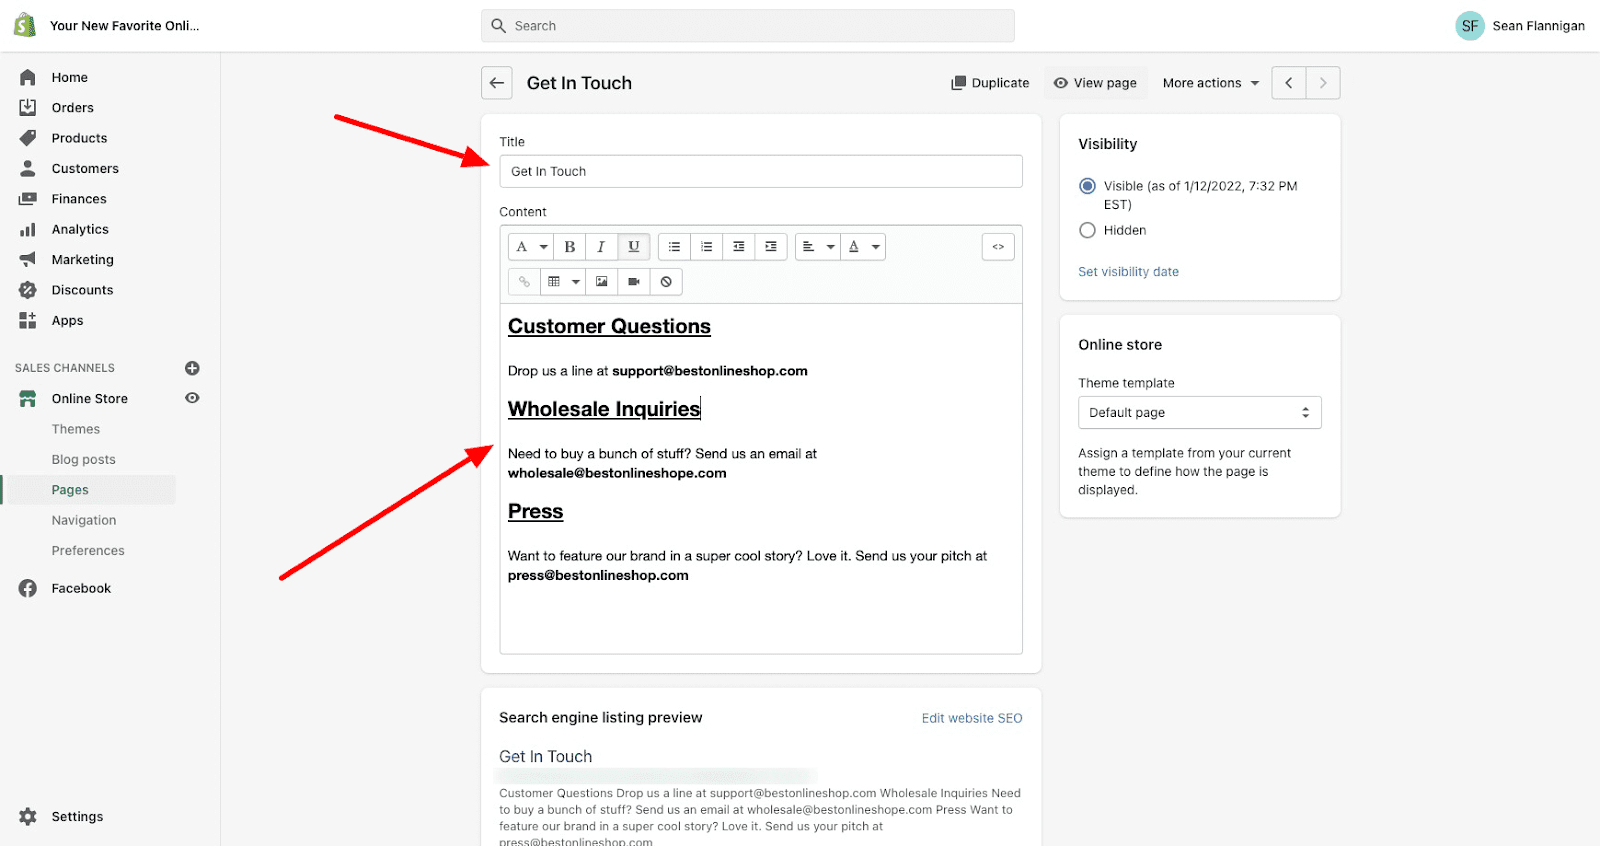
Once you click on this button, or click into your existing Contact page, Shopify will take you to its page editor, where you can give the page a title, and start adding content.
Similar to creating any standard web page on Shopify, you’ll see the “Search Engine Listing” preview section appear on the dashboard, which shows you how your title tag and meta description will appear on the search results.

Click on “Edit Website SEO” to alter this content and make sure it’s suited to your SEO campaign.
On the right of the page, you’ll also see the “visibility” box, which allows you to determine who can see your “Contact” page (which should be everyone). Plus, there’s an “Online store” box, which allows you to choose which theme template you want to save your page as.
After you’ve chosen the right settings for your Contact page, and entered a title, you can begin to add all of the relevant details you like to your page. Make sure you follow our tips above to ensure you cover all of the right information.
Editing your Shopify Contact Page
If you’re using a Shopify 2.0 store theme, then you should be able to make some additional changes to your Contact Page’s appearance and functionality.
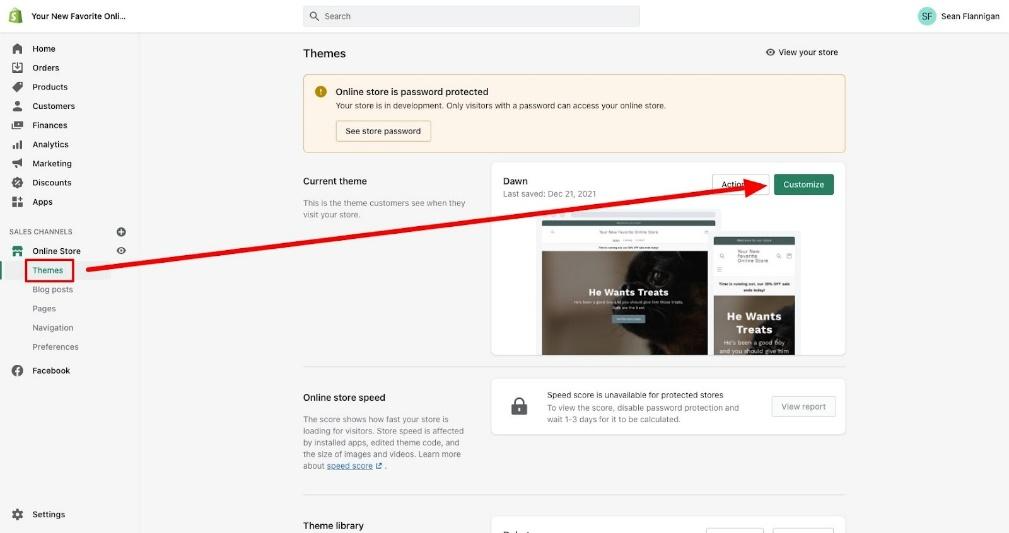
To do this, head over to the theme editor, by clicking on “Online Store”, then “Themes”. Click the “Customize” button on the theme you’re already using.

Once the theme editor loads, click into the dropdown menu to find your Pages, then select the template you saved your contact page to in the previous step. When the template comes up, it will show you the most recent page which used the template.
Once you’ve found your page, you can start customizing, just as you would with any other page on your Shopify site. You can move, add, and edit blocks and sections, change colors and fonts, and even upload images and videos to make your contact page more compelling.
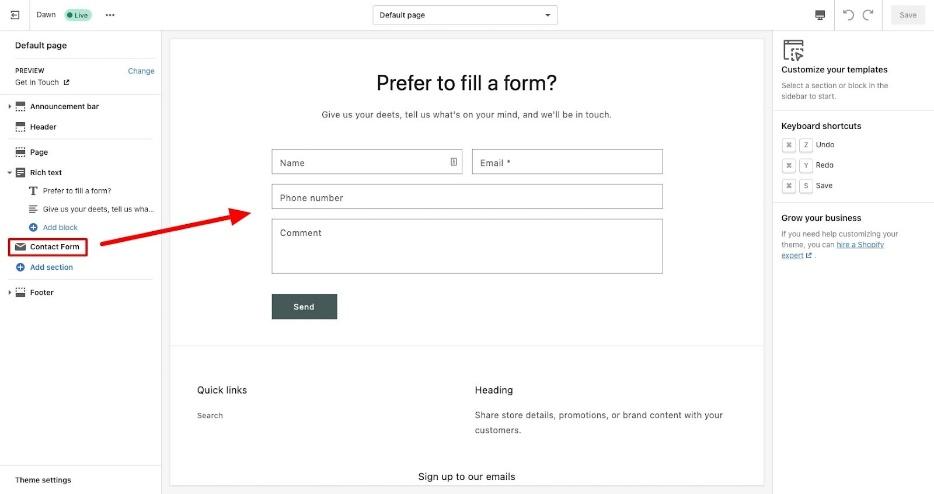
If you didn’t choose the “Contact” template for your theme when you were saving your page in the step above, you’ll need to add your own form section, which you can do by clicking on “Rich Text” then clicking on “Contact Form”.

You’ll also be able to add image banners, multi-media collages, social media buttons, and anything else you’d like to make your contact page look more unique. It’s a pretty simple and straightforward process, but you might need to experiment a little before you’re happy with everything.
Updating your Navigation Links
Once you have your Contact Us page, you’ll need to ensure people can actually find it. This means adding a link to your navigation menu and potentially the footer of your store too.
Head back to the “Online Store” section of your website, and click on “Navigation”. Click into the “Main Menu” section to add your Contact Us page link into the mix. You can also add your link to the footer and anywhere else you choose too. We’d recommend at least including a link on both your footer and main menu to make your page more accessible.
After you’re done, simply save your store, and you’ll be ready to go.
Adding Custom Shopify Contact Pages to Your Site
Notably, you’re not limited to just using the in-built contact page builder within your Shopify store if you want to create a custom Shopify page. You can also check out the comprehensive Shopify app market for “Contact forms” and other similar apps. These can make it much easier to create a more comprehensive contact page with unique features.
Alternatively, if you want to add a unique contact page to a custom Shopify theme or template, you might want to consider reaching out to your Shopify expert for some extra coding help.
Don’t have an expert yet? Reach out to Storetasker today to find the right professional to help you make the most of your Shopify store.
.svg)


.svg)