The Complete Guide to Shopify Amazon Integration

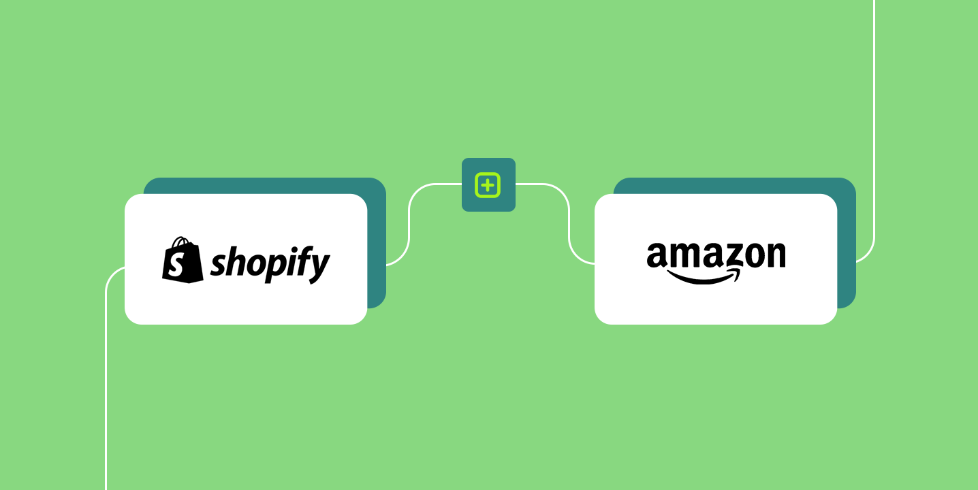
Have you ever considered taking advantage of a Shopify Amazon integration? I’m not talking about selling on a Shopify site and Amazon independently, but instead connecting the two, for an “omnichannel” approach to sales.
Linking Shopify and Amazon gives you an opportunity to build a powerful brand with your own dedicated store, while still taking advantage of the massive reach offered by the world’s biggest online marketplace. While leveraging a Shopify Amazon integration might seem challenging at first, it can actually be an excellent way to boost your revenue.
One study even found that retailers who aren’t selling on multiple channels miss out on up to 20% of their sales. Another report showed that companies using 3 or more channels for sales can increase their order rate by almost 500%.
Why Use a Shopify Amazon Integration?
As I mentioned above, selling on both Shopify and Amazon is an excellent way to increase sales. The more channels you sell on, the more customers you have the potential to reach.
Even if customers don’t find your store online, they can still encounter your products when browsing the Amazon marketplace. The question is, why should you use a Shopify Amazon integration, rather than just selling on both platforms separately?
Simply put, an integration helps:
- Keep your branding consistent: With an integration, it’s easier to maintain a consistent brand across multiple platforms. You can use the same product images, and similar descriptions on both channels. This helps create a more cohesive presence for your store.
- Streamline operations: A Shopify Amazon integration allows you to sync product listings, inventory, and orders between two platforms. This eliminates the need to manually manage two separate sales channels separately, saving you a lot of time and effort.
- Better insights: Aligning your Shopify and Amazon stores will also give you deeper insights into which products sell best on different channels. This can help you make better decisions about how to promote and list products in the future.
How to Implement a Shopify Amazon Integration
The good news for anyone looking to increase their online conversions with multiple sales channels, is that integrating Shopify and Amazon is relatively simple. However, there are a few prerequisites to consider before you dive in. Here’s what you’ll need to get started:
- An Active Shopify store: First, you’ll need an active Shopify store, and a paid subscription to Shopify. This means choosing one of Shopify’s core subscription plans, starting with “Shopify Basic” at $29 per month (annually) or $39 per month (monthly).
- An Amazon Seller Account: You’ll also need to be an active seller on Amazon, which means applying for an account that allows you to sell, rather than just purchase products on the platform. I’ll show you have to set up an account in a moment.
- Approved products and currencies: The currency you accept for your products needs to align with the currencies available on Amazon. Plus, you’ll have to ensure that your products are suitable for sale on Amazon, there are some restrictions on the items you can sell.
- Product information: You should have this already if you have an active Shopify store, but you’ll need all of the information about your products, such as descriptions, images, product titles, and descriptions. Make sure they’re compliant with Amazon’s guidelines.
- Policies: Ensure you have clear policies for shipping and delivery, returns and refunds, customer data privacy and security, and terms of service that align with Amazon’s guidelines.
Now let’s dive into the step-by-step guide.
Step 1: Creating your Amazon Seller Account
For the purpose of this guide, I’ll assume you already have a Shopify store. If you don’t, you’ll need to create an account and build your store before you do anything else. If you need help with this, reach out to the Storetasker team for step-by-step guidance.
If you already have your store, go to the Amazon “Seller Central” page, and click on the “Sign Up” button to create an account.

You’ll be asked to either create a new account, or log into your existing Amazon account and upgrade it to one you can use to sell products. Either way, you’ll need to share some details with Amazon, such as your business name and address, phone number, bank account information, store name, and tax information. Keep in mind, an Amazon seller account isn’t free.
There’s a $39.99 charge for a “Professional Plan”, which stays the same regardless of how many products you sell. Fortunately, this fee does come with some great features, such as the ability to access Amazon’s fulfillment services.
Once your seller account is set up, check Amazon’s guidelines on products and categories that require approval, to ensure you can actually sell your items on the marketplace. You may need to “request” approval for certain types of products, like music or jewelry.
Step 2: Connect Shopify to Amazon
Now, log into your Shopify account, and click on the “+” icon next to “Sales Channels”. Since Shopify automatically integrates with Amazon, you should be able to add it as a sales channel instantly. When you click “Connect” you’ll be prompted to sign into your Amazon account.

Shopify will walk you through the process of linking your Shopify and Amazon Seller Central accounts. Once the process is complete, you’ll need to log back into Amazon to confirm that you want to give Shopify access to your account.
Keep in mind, Shopify no longer offers “fulfillment by Amazon” as a delivery option. The only way to access this extra feature is to download the Amazon Multi-Channel Fulfillment app from the Shopify app store. This will allow you to import and fulfil Shopify orders using Amazon’s fulfillment service.
Step 3: Create/Link Your Amazon Listings
Once you’ve connected Shopify and Amazon, you’ll need to create listings for the Amazon marketplace. Fortunately, you can do this via the Shopify admin page. Click on your Sales Channels tab, followed by “Amazon”, then click on “Listings”.
The easiest way to save yourself some time during this step is to choose the “Link Products” button. This will take you to a library of the products you sell through Shopify, so you can instantly create listings for Amazon, based on the information you already have.
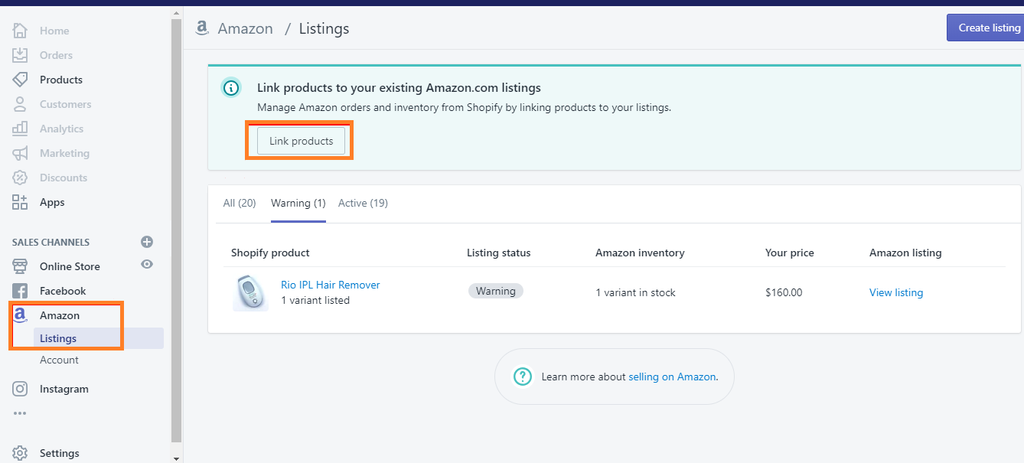
Remember, you might need to optimize the listings that Shopify generates for your Amazon store to make sure they align with Amazon’s guidelines, and marketplace design.
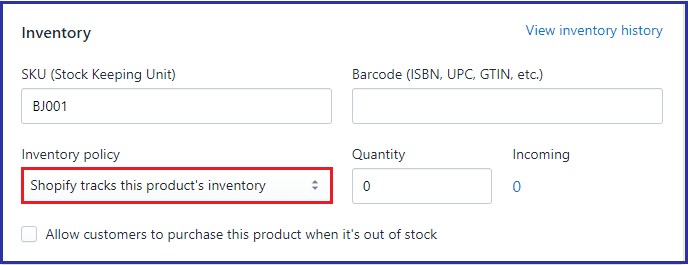
Step 4: Managing your Inventory
When it comes to managing inventory with your Shopify Amazon integration, you have two options. The best option is to automatically sync your inventory to Amazon. You can do this by editing your listings, and selecting the “Use Shopify Inventory Settings” option. Under the “Inventory policy” ask Shopify to track product inventory for you.
Alternatively, if you prefer, you can manage your inventory manually on Amazon. Just click the option to “manually manage inventory” when prompted, and enter the quantity of products you want to sell on Amazon.
Step 5: Managing Fulfillment
Finally, once your integration is complete, whenever customers place an order for one of your products on Amazon, it will be sent to your Shopify admin, and recorded in your “Shopify Orders”. Each order accepted from Amazon will be labelled, so you know where they came from.
To fulfil orders from Amazon within Shopify, log into your Shopify account, and click on the “Orders” button. Select the order number, and click on “Start fulfilling” in the “Order Details” section to open the fulfillment page.
You can choose which shipping method you want to choose, and leverage your “Fulfilled by Amazon” integration if you want to make things easier.
Step 6: Monitoring and Optimizing Performance
At this point, you should have your Shopify Amazon integration fully up-and-running, with products listed both on your Shopify website, and your Amazon storefront. The final step I recommend taking here is paying close attention to your omnichannel selling results.
Tracking your sales numbers (on both channels), inventory, and customer feedback will help you to optimize your sales strategies going more effectively forward.
Don’t be afraid to experiment with different strategies to boost your chances of sales, such as offering customers different payment processing or delivery options. Additionally, remember to constantly promote both your Shopify website, and Amazon storefront. The more traffic you can attract to both channels, the more sales you should make.
Take Advantage of the Shopify Amazon Integration
Managing just one sales channel can seem complicated for beginners, so upgrading your strategy to sell both on Amazon and Shopify at the same time might be a daunting concept. However, integrating Shopify and Amazon is a great way to expand your online presence, and boost your profits.
If you need help building an effective Shopify store, or boosting your chances of sales, you can always reach out to Storetasker for expert support. Our Shopify experts can help with everything from marketing your store, to optimizing themes, and even designing sales campaigns.


Shopify Expert?


