How to Migrate to Shopify: A Step-by-Step Guide

The concept of figuring out how to migrate to Shopify can seem a little daunting to a beginner. If you’ve previously used another platform like Wix or BigCommerce for your online sales, you might have a lot of data to transfer. Fortunately, the process is easier than you’d think.
Even if your website is huge, and the re-platforming process seems like it’ll take a while, you can always simplify things with help from a Shopify expert. Storetasker experts can handle the full migration process for you, and they can optimize your store with bespoke apps and themes.
If you want to go it alone, don’t worry, we’ve got you covered. Here’s your step-by-step guide on migrating your ecommerce website to Shopify.
How to Migrate to Shopify: The First Steps
Before you can migrate all of your data into Shopify, you’ll need a few things, starting with the right Shopify subscription. While you can get a trial of Shopify for three days, you’ll need a full account to import all of your data and get your store up-and-running.
For small to midsized businesses, we’d recommend choosing one of Shopify’s three core plans:
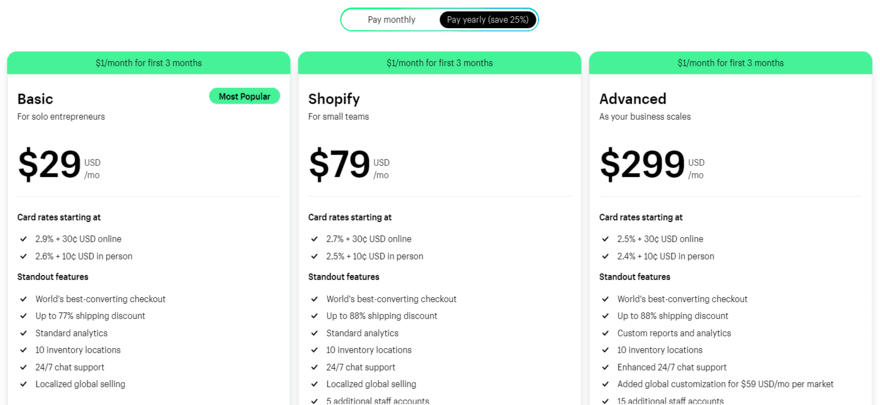
- Basic Shopify: Ideal for solo entrepreneurs with smaller stores.
- Shopify: Great for growing stores in need of more team accounts.
- Advanced: Better for scaling stores in need of advanced analytics.
If you’re looking for more functionality and customization options, or you’re running a large-scale store, we’d recommend switching to Shopify Plus. If you do choose Shopify Plus, you should be able to access support from Shopify’s migration team to help you with the setup process.
If you don’t want to use their help, it’s definitely a good idea to work with a developer, so you can customize your theme, checkout, and site experience more comprehensively.
Once you’ve chosen your Shopify subscription, move onto the following steps.
Step 1: Prepare Your Data and Shopify Store
Once you have your Shopify account, you’ll need to prepare the data you’re going to migrate into your new ecommerce site. Shopify has some helpful guidance here on how to prepare the files and data you’re going to need, depending on which existing store platform you’re already using.
Generally, the process involves exporting data from your existing site in a format you can upload to your Shopify website. Once you have your data, log into your Shopify dashboard:
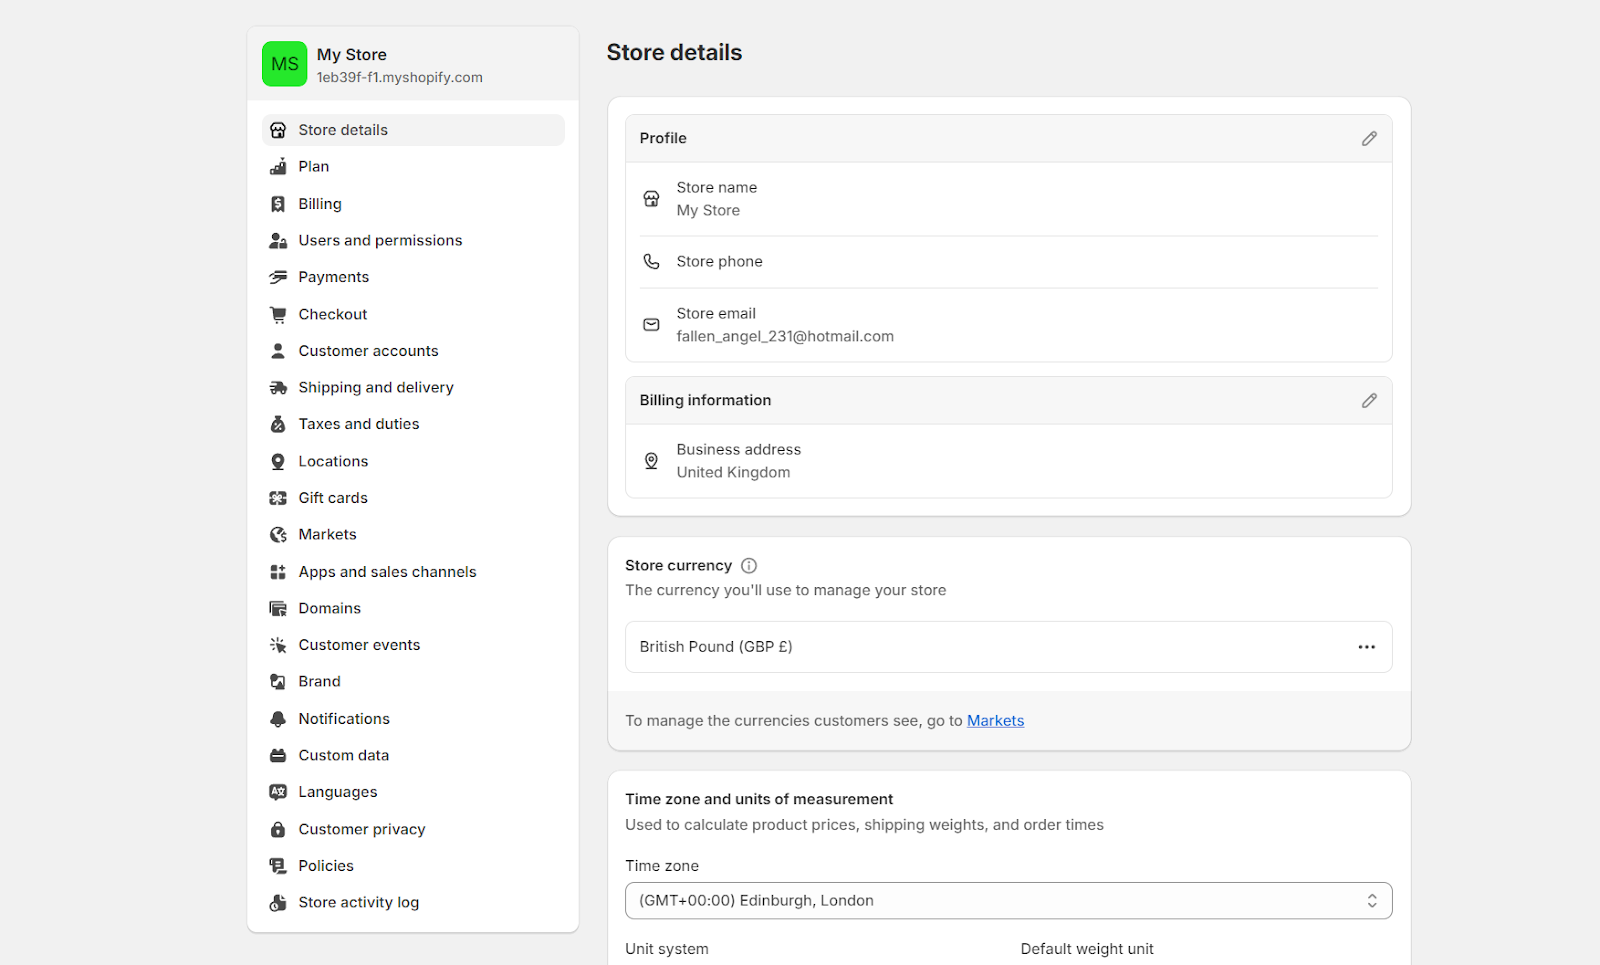
Here, you’ll be able to set up the basic settings for your Shopify store. Before you start adding data, we recommend:
- Naming your store, and setting a legal business name
- Entering your business address and billing information
- Adding your default currency to your store
- Setting up Shopify Markets (when applicable)
- Choosing local delivery and pickup options
Step 2: Importing Store Data to Shopify
Next, you’ll need to import your data to Shopify. You can streamline this process using one of the various “Migration” apps available for Shopify, such as LitExtension, or Migration Pro.

Alternatively, you can do everything manually, which does give you a good opportunity to assess your current store data, and purge anything you no longer need.
While the exact data you need to import can vary the most important things to import will be your:
- Product information
- Customer data
- Historical orders
- Gift cards, and store credits
- Blogs and content
- Pages (such as your “About Us” page)
To import your data, you can either copy and paste content from your existing store, or export data into CSV files and import them into your Shopify store. You can also hire a Shopify partner to do the work for you. The best option for the importing process will depend on the complexity of the data, and the amount you need to import.
For instance, if you have hundreds of product pages, you won’t want to have to copy and paste everything one at a time.
Step 3: Review and Organize Products
Once you’ve imported all of your data, Shopify generally recommends setting up and organizing your products before you start doing things like customizing your theme. You should be able to see all of your products in the “Products” tab on Shopify.
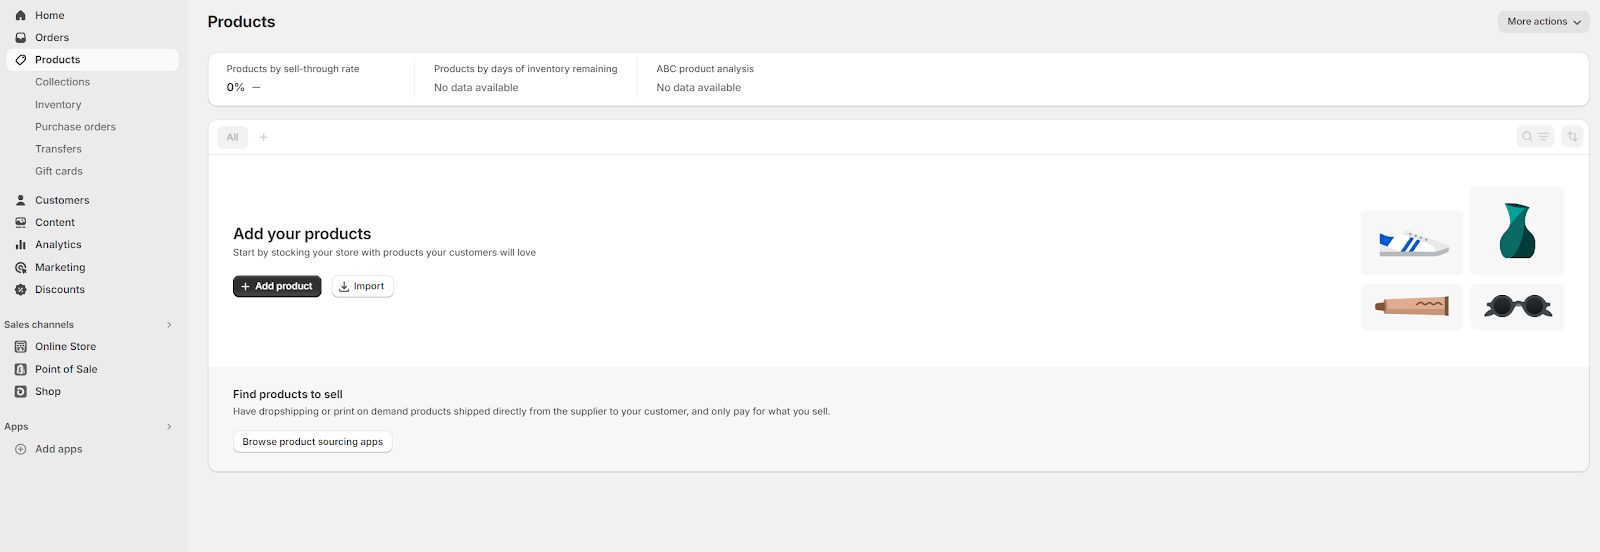
Check for any errors in things like product weight and pricing, problems with photos, or issues with your descriptions before you take your store live. Make sure the meta descriptions for your product pages are optimized too, to boost your chances of ranking on the search engine result pages.
It’s worth taking a moment to consider whether you need to create product collections and organize items into categories, which Shopify can help you do automatically. Plus, make sure you’re familiar with how Shopify’s inventory management tools work.
Step 4: Choose and Edit Your Theme
Once you have your products ready, you can start changing the appearance of your Shopify site. The easiest way to do this is with a free or paid Shopify theme. There are tons of options to choose from, and you can usually customize them to suit your brand.
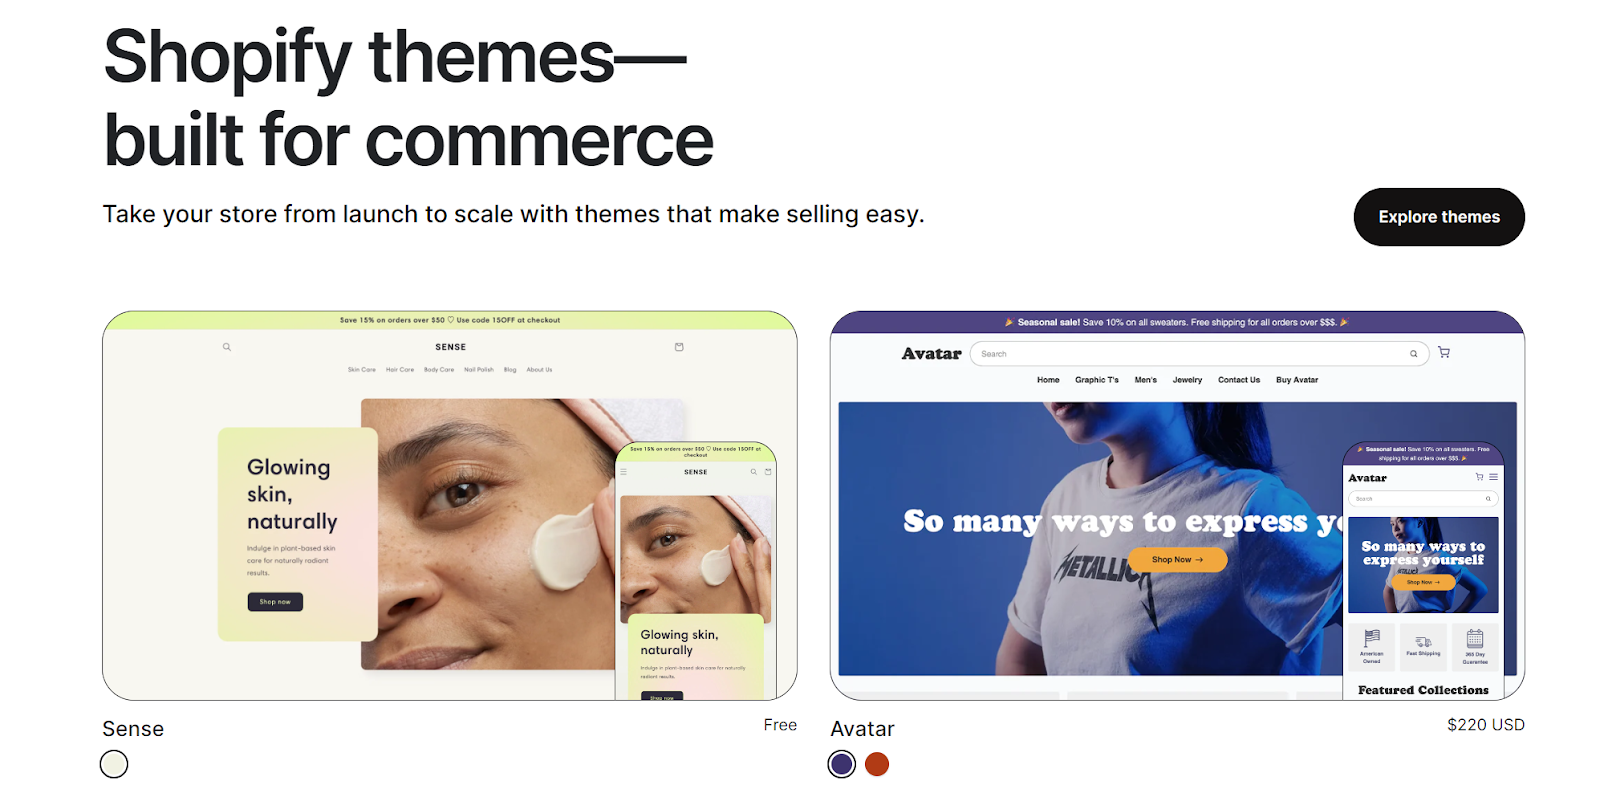
Alternatively, if you’re learning how to migrate to Shopify and you want to create a brand-new aesthetic for your store, you can ask a developer to design one for you. To add a theme to your website from the Shopify theme store, all you need to do is go to “Explore Themes” in the “Themes” section on Shopify, and choose the one you want.
From there, click “Add Theme” or “Buy”. When you have your theme, you can head back into the Shopify Dashboard, and the “Themes” section, then click the “Customize” button next to your chosen theme to adjust its appearance. Notably, the extent to which you can customize each theme will vary depending on the option you choose (and your developer knowledge).
Step 5: Configure Crucial Shopify Settings
Before you launch your new store with Shopify, you’ll need to ensure you have all the right settings implemented. You will have already added some basic details to your store during the first stage in our “How to Migrate to Shopify” guide. Now, go back into your Settings and set up:
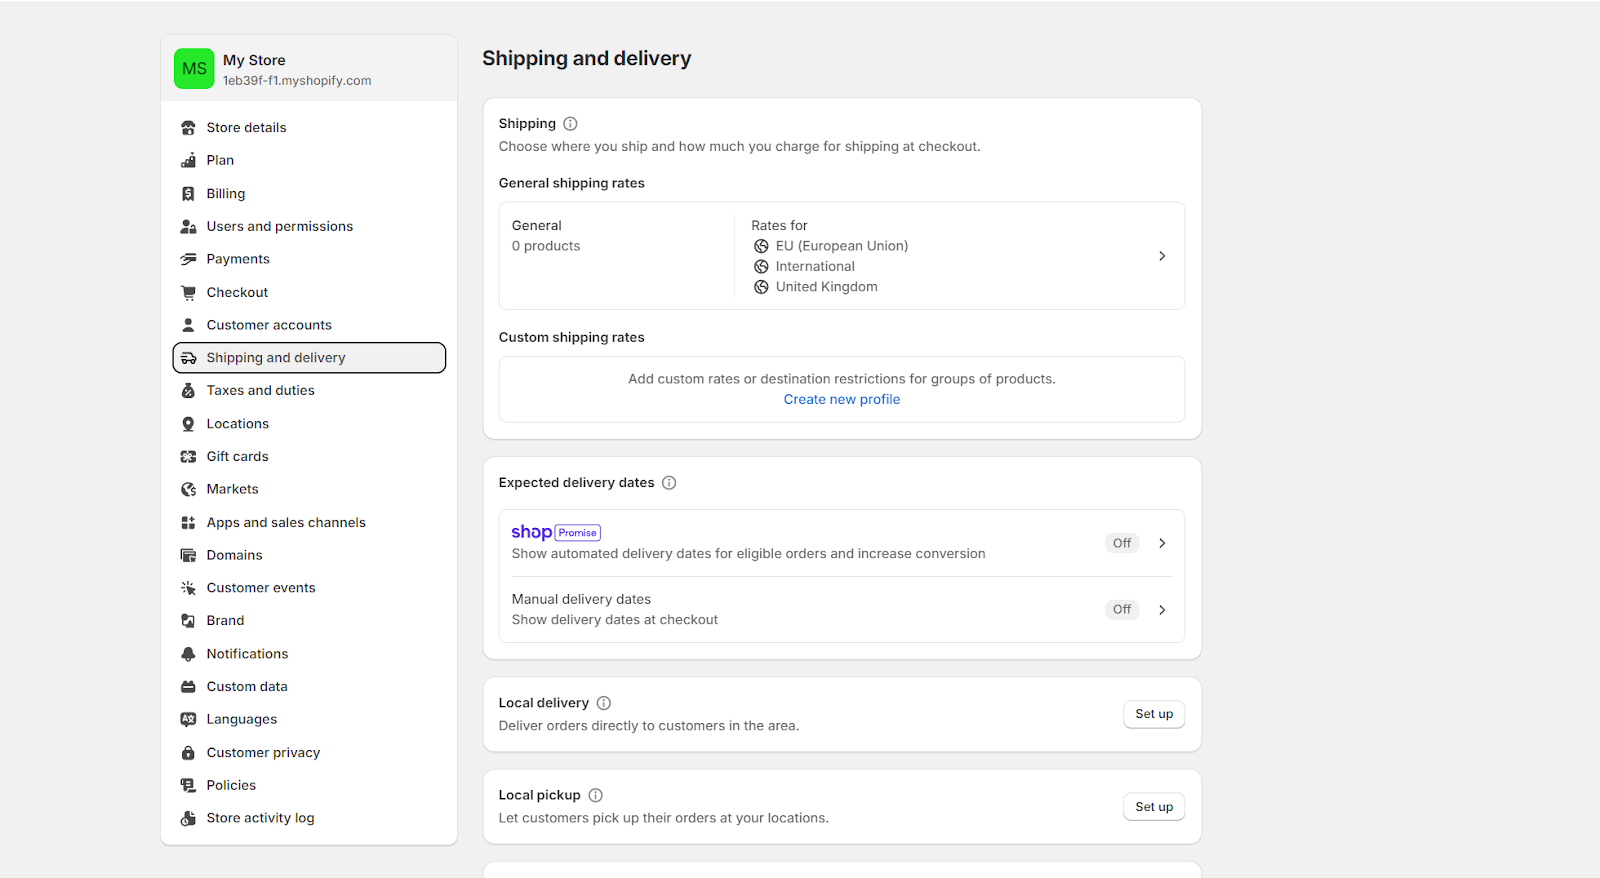
- Shipping details: Within the Settings section of your Shopify store, click on “Shipping”, and review your store’s address and locations. Create shipping zones, based on your customer’s location, and set shipping rates for the zones you create. You can also choose which shipping strategy you’re going to use, such as charging based on weight or location. Plus, you can connect your store to fulfillment services.
- Configure taxes: In the “taxes” section of your Shopify admin, you can automate the process of applying taxes to your products. You’ll be able to apply shipping taxes to products based on the location they’re being delivered to. Plus, you can use Shopify’s tools and add-ons to keep track of your taxes throughout the year.
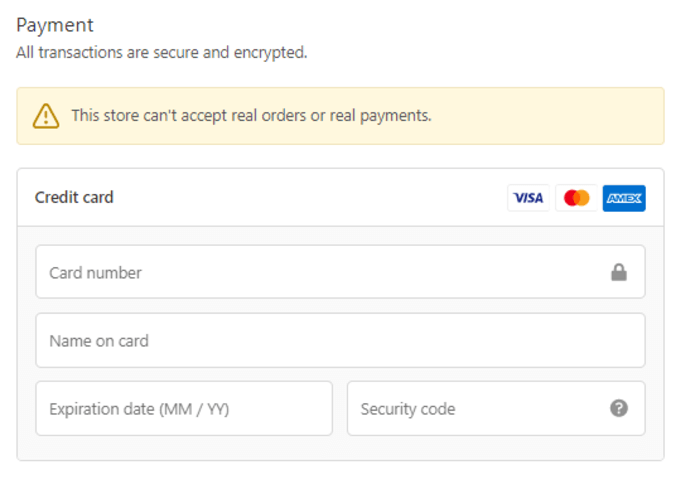
- Choose your payment provider: To ensure your customers can pay you, you’ll need to select a payment provider. To keep costs low (and things simple), we recommend using Shopify Payments. However, you can always connect to a third-party payment provider instead. Just be aware you may need to pay extra transaction fees.
- Set up your checkout: Visit the “checkout” section on your Shopify admin to set up your order fulfillment and payment authorization settings. You can also add your store’s policies here, and edit the customer information your store will ask for on the checkout page. Unfortunately, you won’t be able to customize the checkout too much without Shopify Plus.
- Choose a domain: If you already have a domain for your old store, you can migrate that domain to Shopify using the steps provided by Shopify here. Alternatively, you can purchase a new domain through Shopify or a third party vendor, and set up email forwarding, to ensure customers can still reach you from your old website address.
Step 6: Add Staff and Test Your Store
If you’re running your Shopify store alone, or simply working with “collaborators” you can skip the process of adding team members to your store. However, if you do have staff, you’ll need to create accounts for them, and set account permissions in your Shopify admin dashboard.
Once you’ve done this, make sure that your Shopify site is working as it should by, by loading up your website, clicking through the pages, and testing the site’s performance on different browsers and devices. You can also run a test order on Shopify to check that your customers can buy your products.
Shopify allows you to set up test orders for completing failed and successful transactions, refunding, and cancelling an order, and archiving a successful order.
Step 7: Set Yourself Up for SEO Success
Technically this isn’t a mandatory step in learning how to migrate to Shopify, but we definitely recommend doing it anyway. Shopify already has some great features to help boost your search engine rankings, and it’s worth taking full advantage of them.
A few of the things you can do include:
- Creating a blog: Where you can publish all of the content you posted on your other website, and create new content specifically targeting the keywords customers search for.
- Setting up URL redirects: If you already have a good ranking for pages on your existing store, setting up redirects will help you to retain that ranking. Go into your Online Store section on the Shopify admin page, and click into “Navigation” to create redirects.
- Editing meta descriptions: The Shopify admin gives you various areas where you can edit the meta description for your webpages, product pages, and collection pages. Editing these descriptions and including keywords can improve your ranking potential.
- Submit your site map with Google: All Shopify stores will automatically generate a sitemap.xml file that includes all the links to your primary pages, product images, products, collections, and other data. Submitting this sitemap to Google will help it crawl your store.
Step 8: Optional Extras
Technically, once you’ve taken all the steps above you can go ahead and launch your Shopify store (and shut down your previous site if you want to). However, there are some additional steps you might want to take too, such as:
- Installing apps and integrations: If you used apps and integrations for things like marketing and accounting tools on your previous store, download them from the Shopify app market. You should be able to log into these apps using the same credentials.
- Migrate to Shopify POS: If you have a brick and mortar retail location, consider downloading Shopify POS Lite (or POS Pro if you’ve paid for the plan). You can also purchase hardware for your point of sale from Shopify.
- Adding other sales channels: Shopify gives you the option to integrate your online store with other sales channels, such as social media platforms and marketplaces. Adding these channels to your store can help increase your revenue.
Ready to Migrate to Shopify?
While learning how to migrate to Shopify can seem a little stressful at first, it’s easier than you’d think. Provided you have the data you need, and a little time, you should have no problems getting your Shopify store up and running.
If you do encounter any issues, you can always reach out to the Shopify team for extra support, or contact Storetasker for help from a Shopify expert.


Shopify Expert?


