Marquee deprecated: What to do next
What I've been thinking about
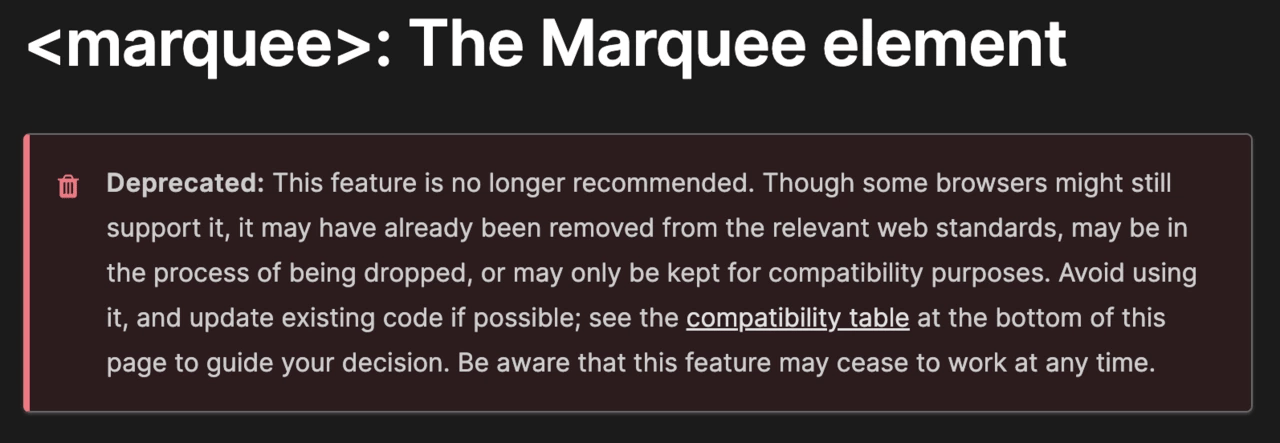
In the past I’m sure you’ve needed to build a section that automatically moves content from one side to another, you then probably looked for a solution and found the HTML tag , only to see that it has been deprecated.
Marquees can look quite complex to a lot of developers and you may even feel the need to use a library or app, however continuing from my previous i only speak liquid post, where I broke down how you can slowly move away from using some apps and begin building out features, I’m going to break down a really simple solution that I’ve been asked about many times before - There’s even a few bonus customisations if you make it to the end of the article!
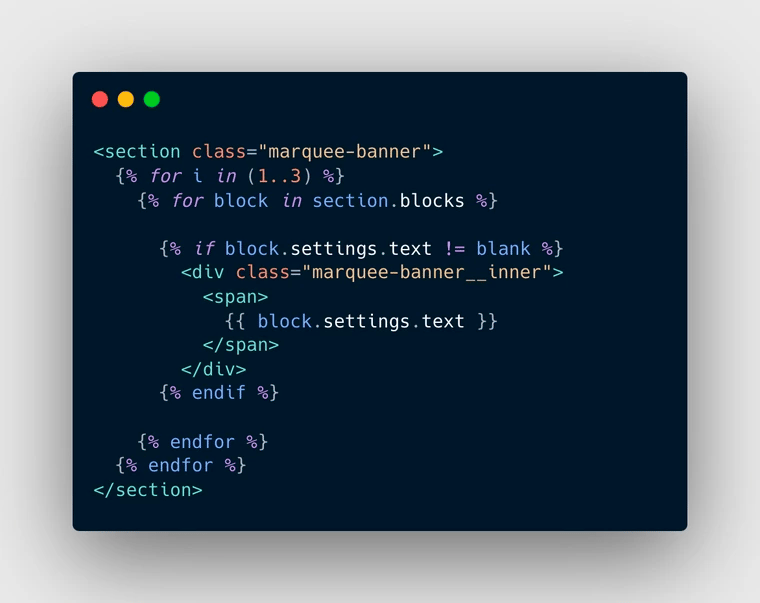
So we’ll start off with the basic Shopify Section setup

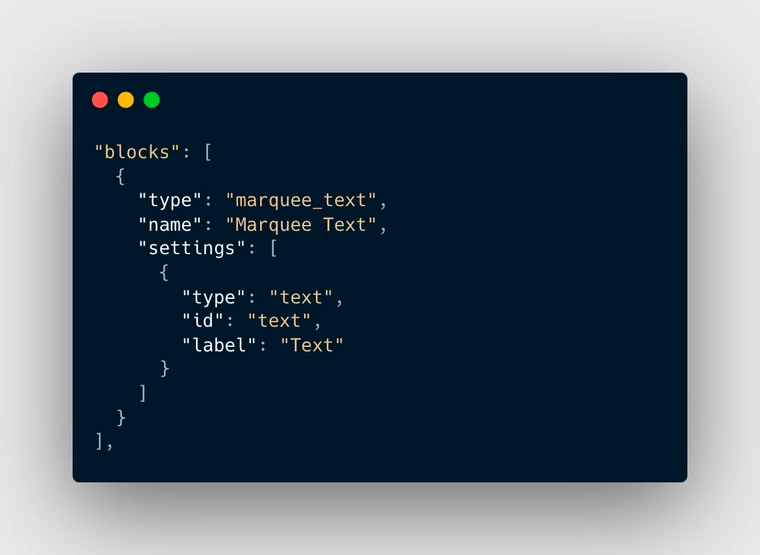
We’re then going to need a way of adding in the text to display within the marquee as it scrolls. I like to build sections as customisable as possible for clients, so I’ll create these as blocks with a text setting so that the client can add as many or as little as they need.
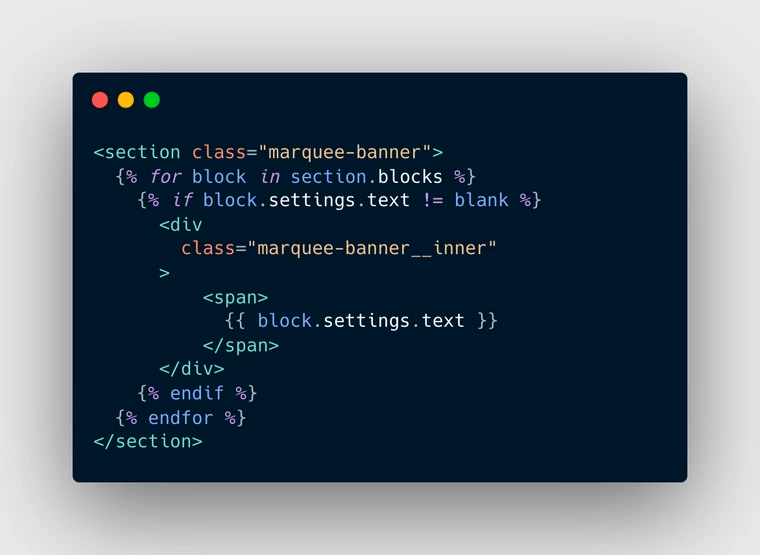
We can then loop through each of these blocks and display the text. On a side note it’s always good practice to add in a check to make sure that there is actually a value set for a specific setting before trying to display all of it’s HTML content. It’s easy to accidentally add a new block to a section and I see this all the time, even on live sites. If this check isn’t there, then it can mean that the HTML is displayed without the content and things start to break, for example imagine a carousel with a missing image but still having all the slide code in place.
The most common question I get when I show other developers this marquee section is how do you make sure that there is no gap at the end of the animation, this would completely ruin the effect if each time the content got to one side it completely just stopped and then reset. So to prevent this I use an additional for loop that will duplicate the content to give the effect that it seamlessly just keeps scrolling across.
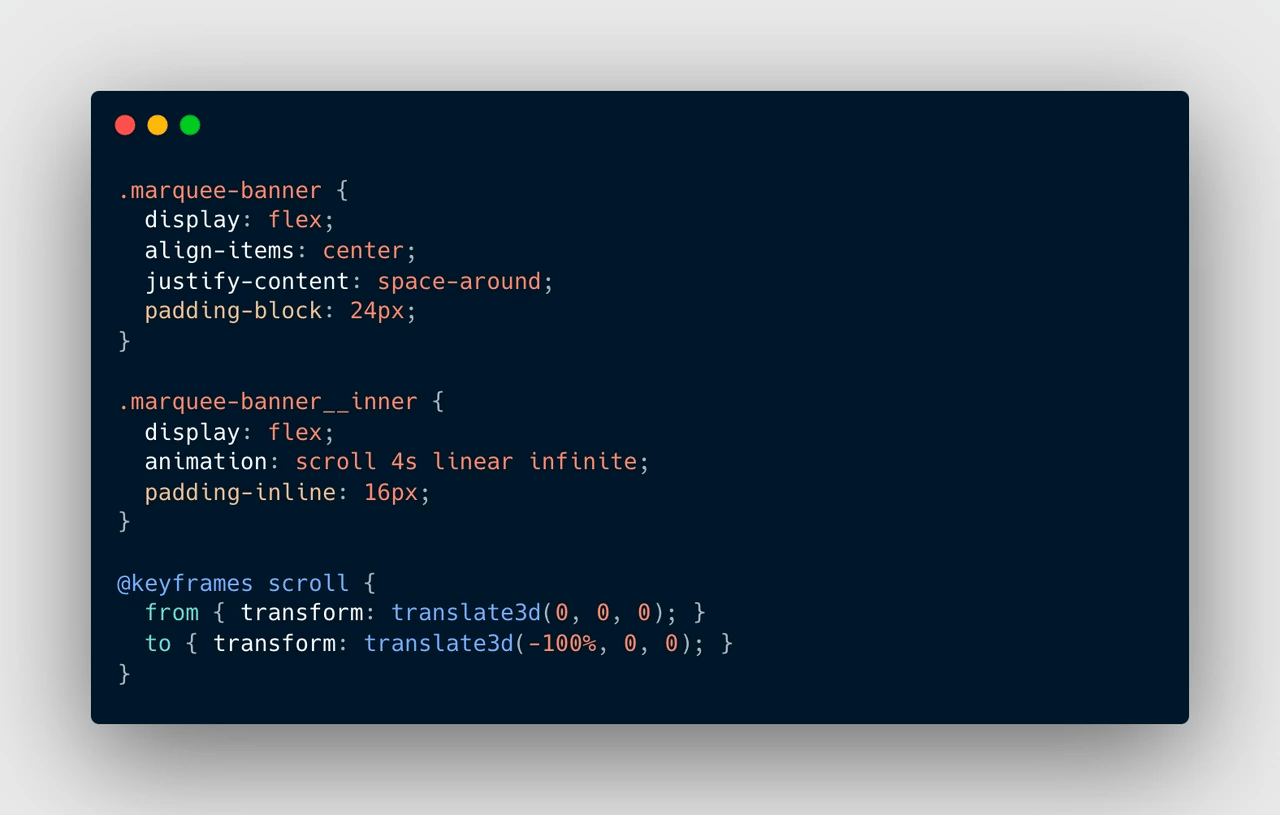
At the moment it probably doesn’t look a lot like the marquee you had in mind, but now’s the fun part and where we bring it all together… CSS time.
Through a very simple CSS transform animation you can create the effect of the content moving from one side to the other.
As promised at the beginning, I was going to add a few bonus customisations that will make this section even better!
In the code above you learnt how to make the marquee move right to left, but you might need to move the opposite way, to do this it’s as easy as changing the -100% value to 100%, you should then see that it has switched directions.
The speed can also easily be changed by just simply updating the animation time from the default 4s to whatever you need.
If you want to give your section more space vertically then change the padding-block value, and if you want to give each item in the marquee more space so the gap between them is bigger you can also change the padding-inline value.
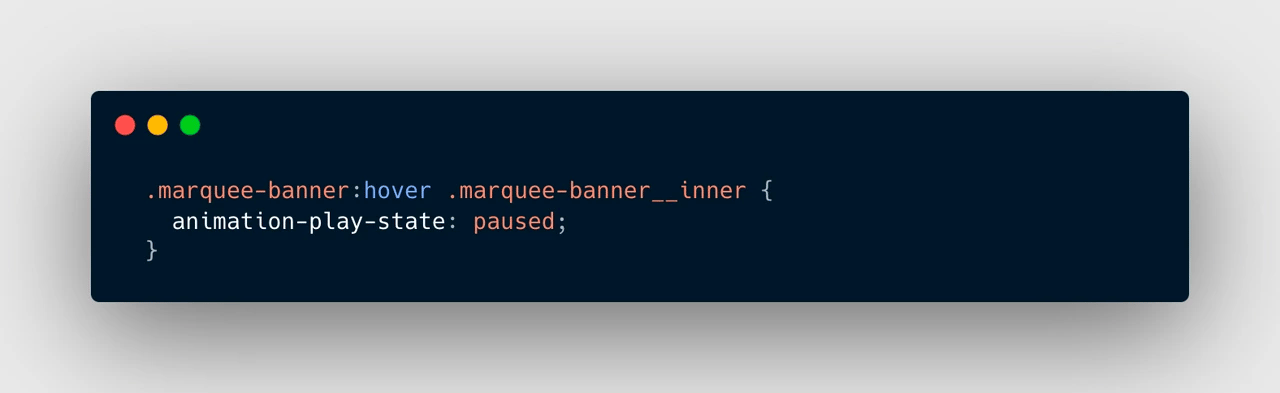
Another really cool customisation that I’ve been asked a few times for by clients is the ability for it to stop when the customer hovers above the section, this is actually really easy too and can be achieved in just a couple lines of code.
This marquee section does not only just work for text either, I recently built this section below for a client who needed to show off all their magazine cover designs and the same exact effect worked really nicely with images

3 links you can't miss
- Fireflies AI - This is something that I’m currently testing out and I know there are quite a few different services that do the same thing, but it’s amazing to not have to be taking notes in meetings anymore and just be able to be present in the conversation, whilst still having all the details ready for you straight after.
- Scribe How - I’m always having to write out steps to clients or QA testers, this takes up quite a bit of my time and slows me down. I’ve recently also been testing out this Chrome Extension that allows you to automatically generate a step-by-step guide.
- Arc Browser - As developers, we’re always testing our code out on different browsers to make sure everything looks correct… Well here's another one to add to the mix! I’ve been using Arc for quite a while and I love it!
One app I like
I’ve used Data Export IO quite a few times now for different clients and have been able to save them a lot of time and money.
Whilst the app’s main use is for generating reports, which I can imagine is really useful, I’ve actually found it to be amazing at automatically generating order spreadsheets that can be sent by businesses to their suppliers/manufacturers.
Previously, one client I worked with was paying staff to manually copy and paste order information into a specific format that a supplier needed so they could then ship out the order, this was taking them quite a few hours each day and they were struggling to keep up with demand.
I was able to create a new spreadsheet that used conditions and filters to get the data in the specific format that was needed. The app also has a feature where it can automatically email a pdf at a set time. I set this up to email the supplier twice a day with all the order data so that it no longer required any manual work. The client was only ever able to get this done once a day so this also meant that orders could be processed a lot quicker and allow customers to get them sooner.


Shopify Expert?


