How to Use the Shopify Buy Button: The Easy Guide
Have you ever wanted to start selling products, merch, or services online, without having to create your own ecommerce site from scratch? Maybe you already have a blog, and you want to monetize it by selling some affiliate products, or adding drop shipping into the mix. Maybe you’re looking for a way to enhance your creator profile as an influencer with merchandise sales?
Fortunately, there’s a solution – and it’s much simpler than you might think.
The Shopify Buy button is a simple tool, created by the Shopify team, which allows virtually any online seller to add ecommerce functionality to a range of different platforms. Basically, it’s a mini plugin or app that you can use to showcase product pictures, descriptions and prices, while also giving your customers the option to checkout instantly.
So, how does it all work?
Today, we’re going to guide you through the process of adding your very own Shopify Buy button to any website. No coding expertise required.
Adding the Buy Button Sales Channel to your Online Store
Getting started is simple. You’ll need to start by logging into your Shopify admin account, and clicking on the “Sales Channels” section in your left-hand menu. If you see the “Buy Button” channel has already been added, you can click into it.
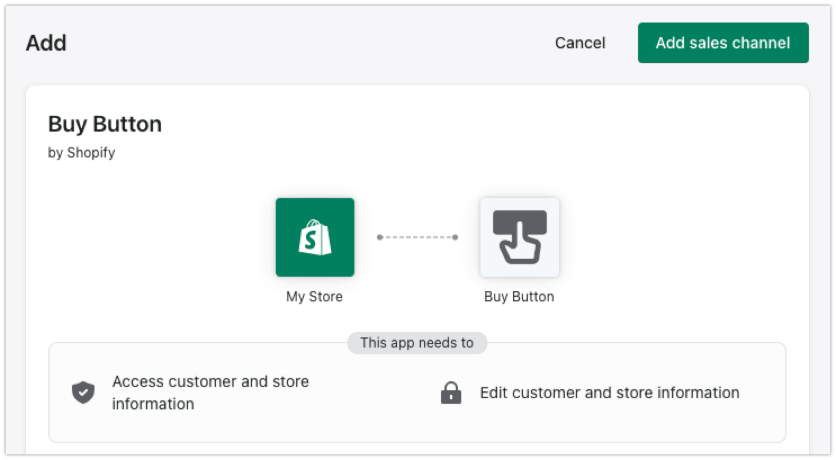
If not, go to the Buy Button sales channel page on the Shopify App Store, by clicking on Settings > Visit the Shopify App Store then searching for “Buy Button”. Click on “Add App”, then “Add Sales Channel” when Shopify gives you the option.
Your page should automatically refresh, and you’ll see the “Buy Button” option listed under the Sales Channels tab on the left-hand menu.
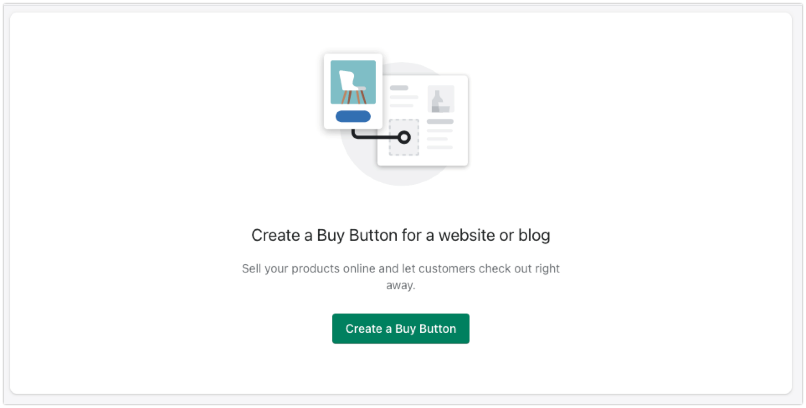
Once you have the Buy Button sales channel enabled, you can start creating your buttons. Navigate into the Buy Button page, by clicking on the option in the “Sales Channel” list, and click on the “Create a Buy Button” section.
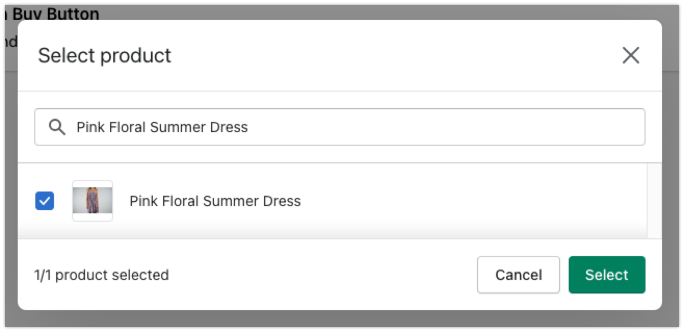
You’ll be able to create Buy Buttons for a single product, or an entire collection of products. Shopify will ask you to select which option you prefer, then you’ll need to click the checkbox next to each product you want to create your buy button for.
Customizing your Shopify Buy Button
Once you’ve created your button with Shopify, you’ll be able to customize its look and feel. You can adjust everything from the color, font, layout style, and size of the button. Plus, you’ll be able to make changes to what your buy button will actually do.
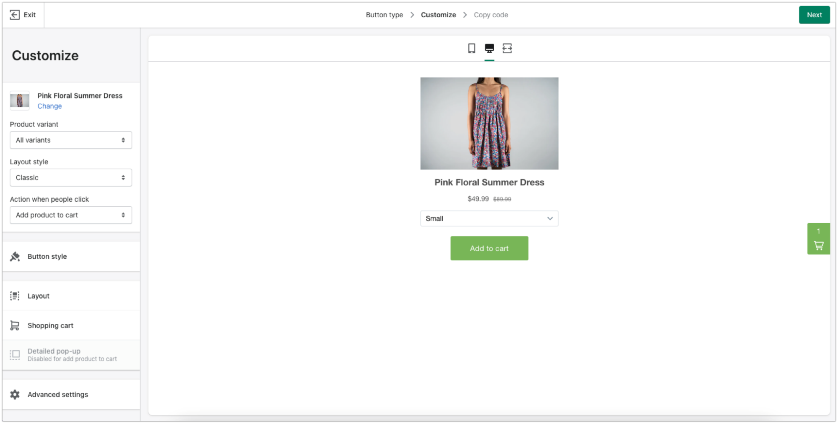
When you’re in the Buy Button editor, after clicking “Create”, you’ll see all of your customization options listed on the left-hand side of the page. The preview on the right-hand side will update automatically as you make adjustments. Here are some of the things you can edit:
- Product variants: Choose which variations of a product you want to be purchasable through your buy button. Shopify automatically makes all variants available by default.
- Layout: Choose between Basic, Classic (to show a product image), and full view (to show a product image, price, and description beside your buy button).
- Actions: You can decide whether clicking a button will allow your customer to add a product to their cart, or direct them straight to your checkout. You can also make it so clicking the button opens a page of product details for your customers.
- Button style: Here you can make changes to the font, colors, size, and even the shape of the corners on your buy button.
- Layout: Make fine adjustments to the layout by adjusting the font colors, typography settings, and the button text (or CTA).
- Shopping cart: Adjust the settings of your shopping cart widget, including any copy and colors. This option is only available if you don’t choose the “direct to checkout” layout.
- Detailed popup: If you choose the “open product details” option as your action when people click the buy button, you can customize the text, colors, and various other options for the popup that opens.
- Advanced settings: Here you can make changes to how your buy button is served to your customer, and how the checkout appears. For instance, you can redirect customers in the same tab they’re using, or open a pop-up window that closes when the order is complete.
If you make any changes to your Buy Button after embedding them onto your store, you’ll need to generate the code and add it to your site again. Customizing your button won’t cause any automatic changes to take place within your existing embeds.
Using the Shopify Buy Button
Once you’ve created your Buy Button and customized it to match your website and its theme, you can click the “Next” button, and Shopify will automatically generate some code. You can copy that code to embed the button into virtually any HTML webpage.
Adding the HTML to your store will create a Buy Button and cart widget that connects directly to your Shopify account, allowing you to manage and process any orders from any web page in the same space. Just keep in mind, the process of adding your code to your store can vary depending on the website builder or tool you’re using.
If you want to add a buy button to a landing page on your existing Shopify store, you can do so by going into your Shopify admin, clicking on “Online Store”, then going into Blog posts or Pages. Select the spot you want to add the Buy Button to, and select the <> button to add HTML.
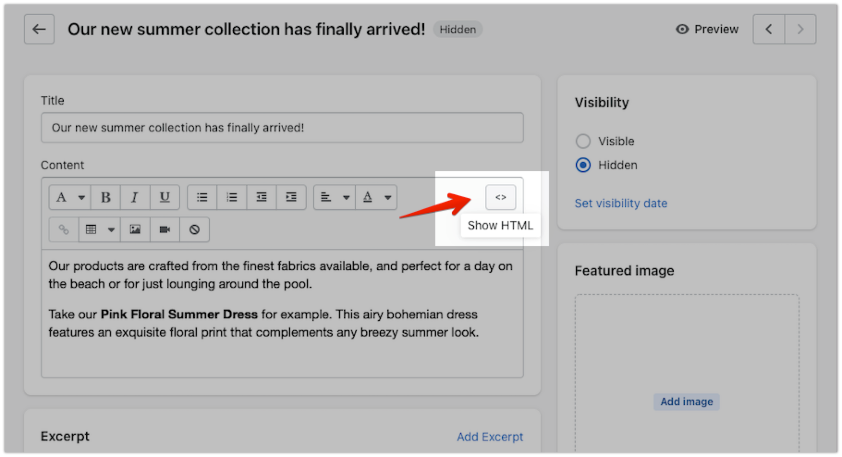
Paste the code for your Buy Button wherever you want it to appear on your page, then click “Save”. You can also preview the page before you publish it to make sure everything is working properly.
Squarespace
If you’re adding a Buy Button to another website, there may be different processes to follow. For instance, on SquareSpace, you’ll need to log into your admin account, click into the Page you want to edit, then choose the “More” section in the content blocks editor to select “Code”. Add the HTML to the “code” field, to create your Buy Button.
Keep in mind, the process might vary slightly depending on the theme you’re using for Squarespace. If you have a more complex theme, you might need to consider working with a developer.
WordPress
On WordPress, the process is very straightforward. If you’re using the Block Editor for WordPress, you can click onto any page, and use the “+” button to create a “Custom HTML” block. Once again, add your Buy Button code into the space where you want it to appear, and Save the page.
You can also add your Buy Button to your WordPress menu by clicking on “Appearance”, then “Customize” to open the theme editor. Select the “widgets” option, and click on “Add a widget” followed by “Text”. Paste in the Buy Button embed code and save your theme.
Wix
If you want to add your Shopify Buy Button to a Wix website, log into your account, and click on the “My Sites” page. Select the site you want to add your button to, and click “Edit”. When you enter the Wix Editor, click on the “+” button, and select “More” followed by “HTML code”.
This will bring a HTML widget onto your page where you can enter your Buy Button code. In the pop-up, paste your embed code, and click “Apply”. You can adjust the size of the widget to your needs, within the Wix editor, before hitting “Save”.
Make Ecommerce Easy with the Shopify Buy Button
The Shopify Buy Button is a simple and efficient way for anyone to add ecommerce functionality to virtually any website or online environment. You can add your buttons to landing pages, blogs, portfolios, and a range of other environments, to boost your chances of sales.
Of course, if you want to create a more advanced website and online storefront, you might want to consider making the most of everything Shopify has to offer. Contact Storetasker today to find out how we can connect you with the right expert to build or manage your online store.


Shopify Expert?


